In today’s fast-paced trading environment, automation can be a game-changer for traders looking to enhance their efficiency and execution speed. This post will guide you through the process of automating your trading strategies using PickMyTrade and Rithmic, ensuring you can make the most of your trading opportunities.
Getting Started with PickMyTrade
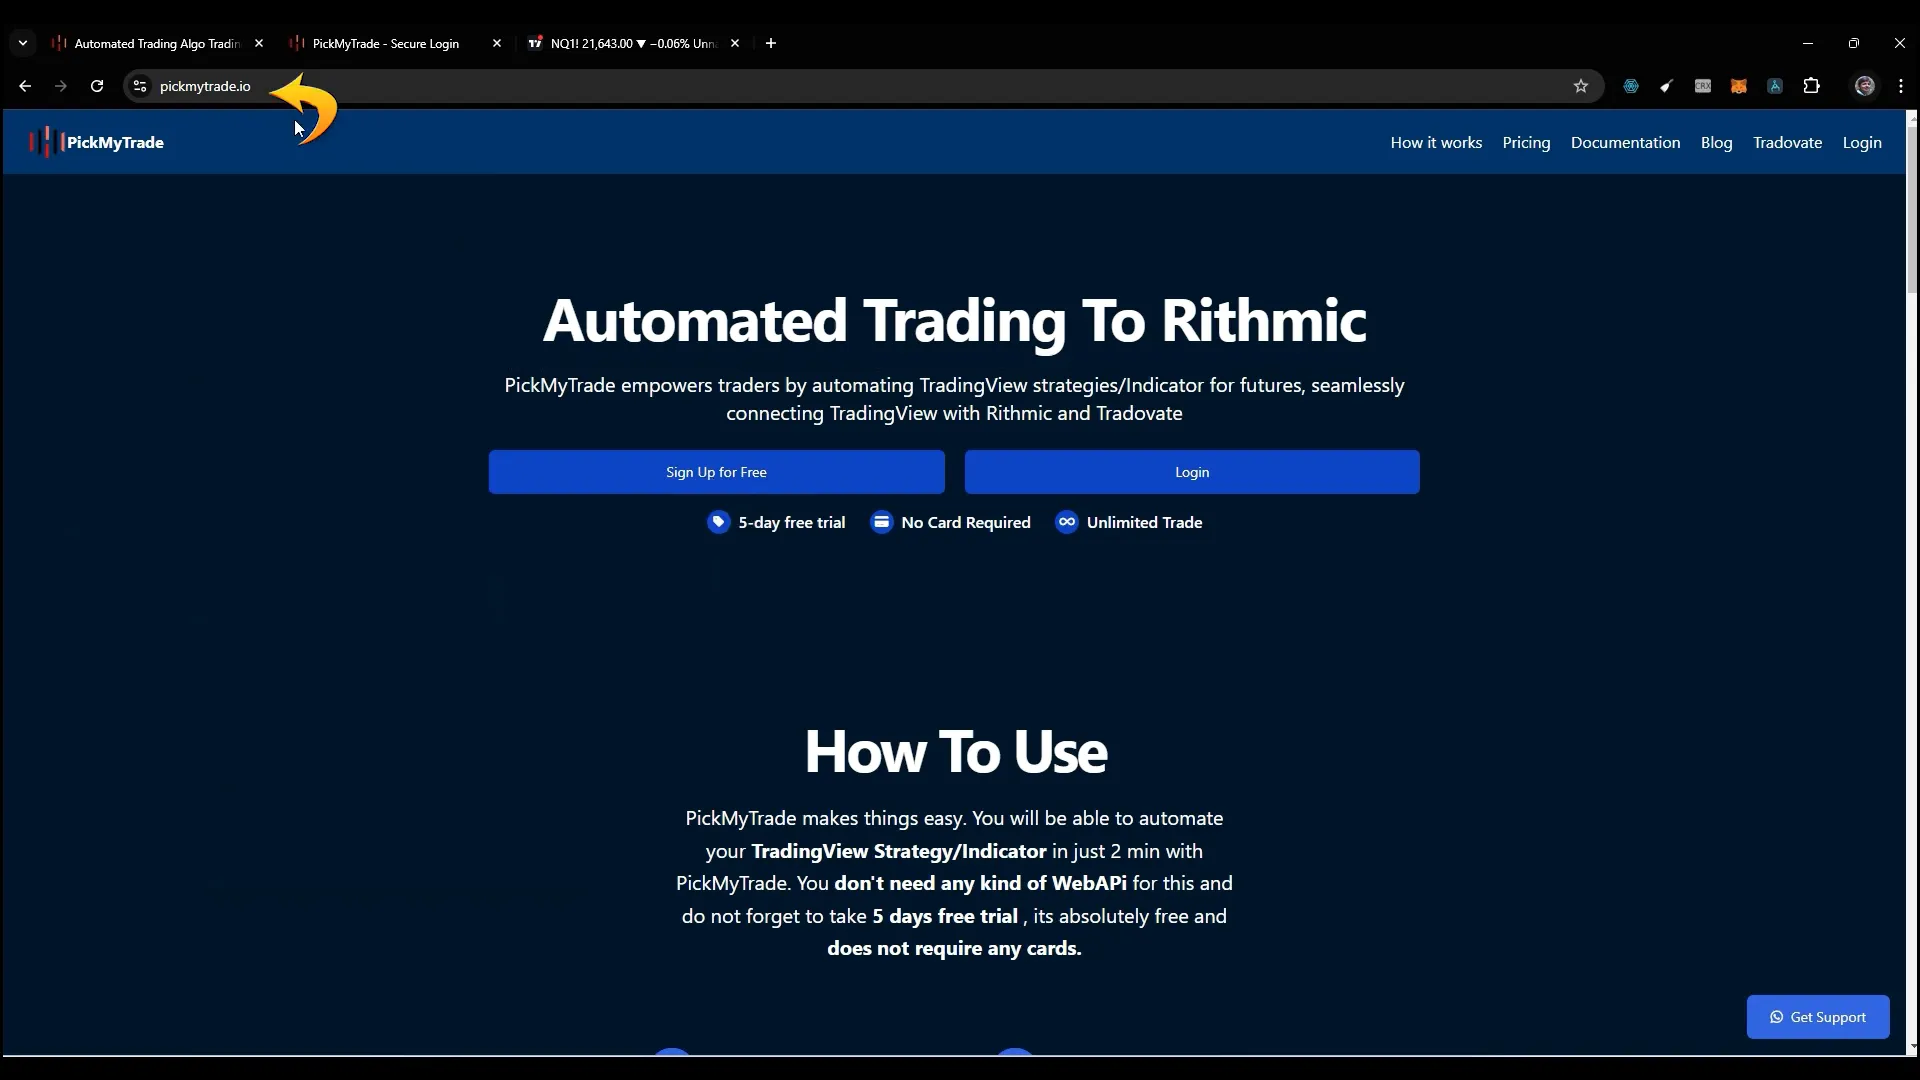
To begin automating your trading, the first step is to visit PickMyTrade.io. This platform is designed specifically for Rithmic users and offers a seamless way to connect your trading accounts.
If you don’t have an account, you can create one directly on the site. For existing users, simply enter your credentials to log in. Upon logging in, if you don’t have an account with Rithmic, you will see a prompt to create a Rithmic connection.
Creating a Rithmic Connection
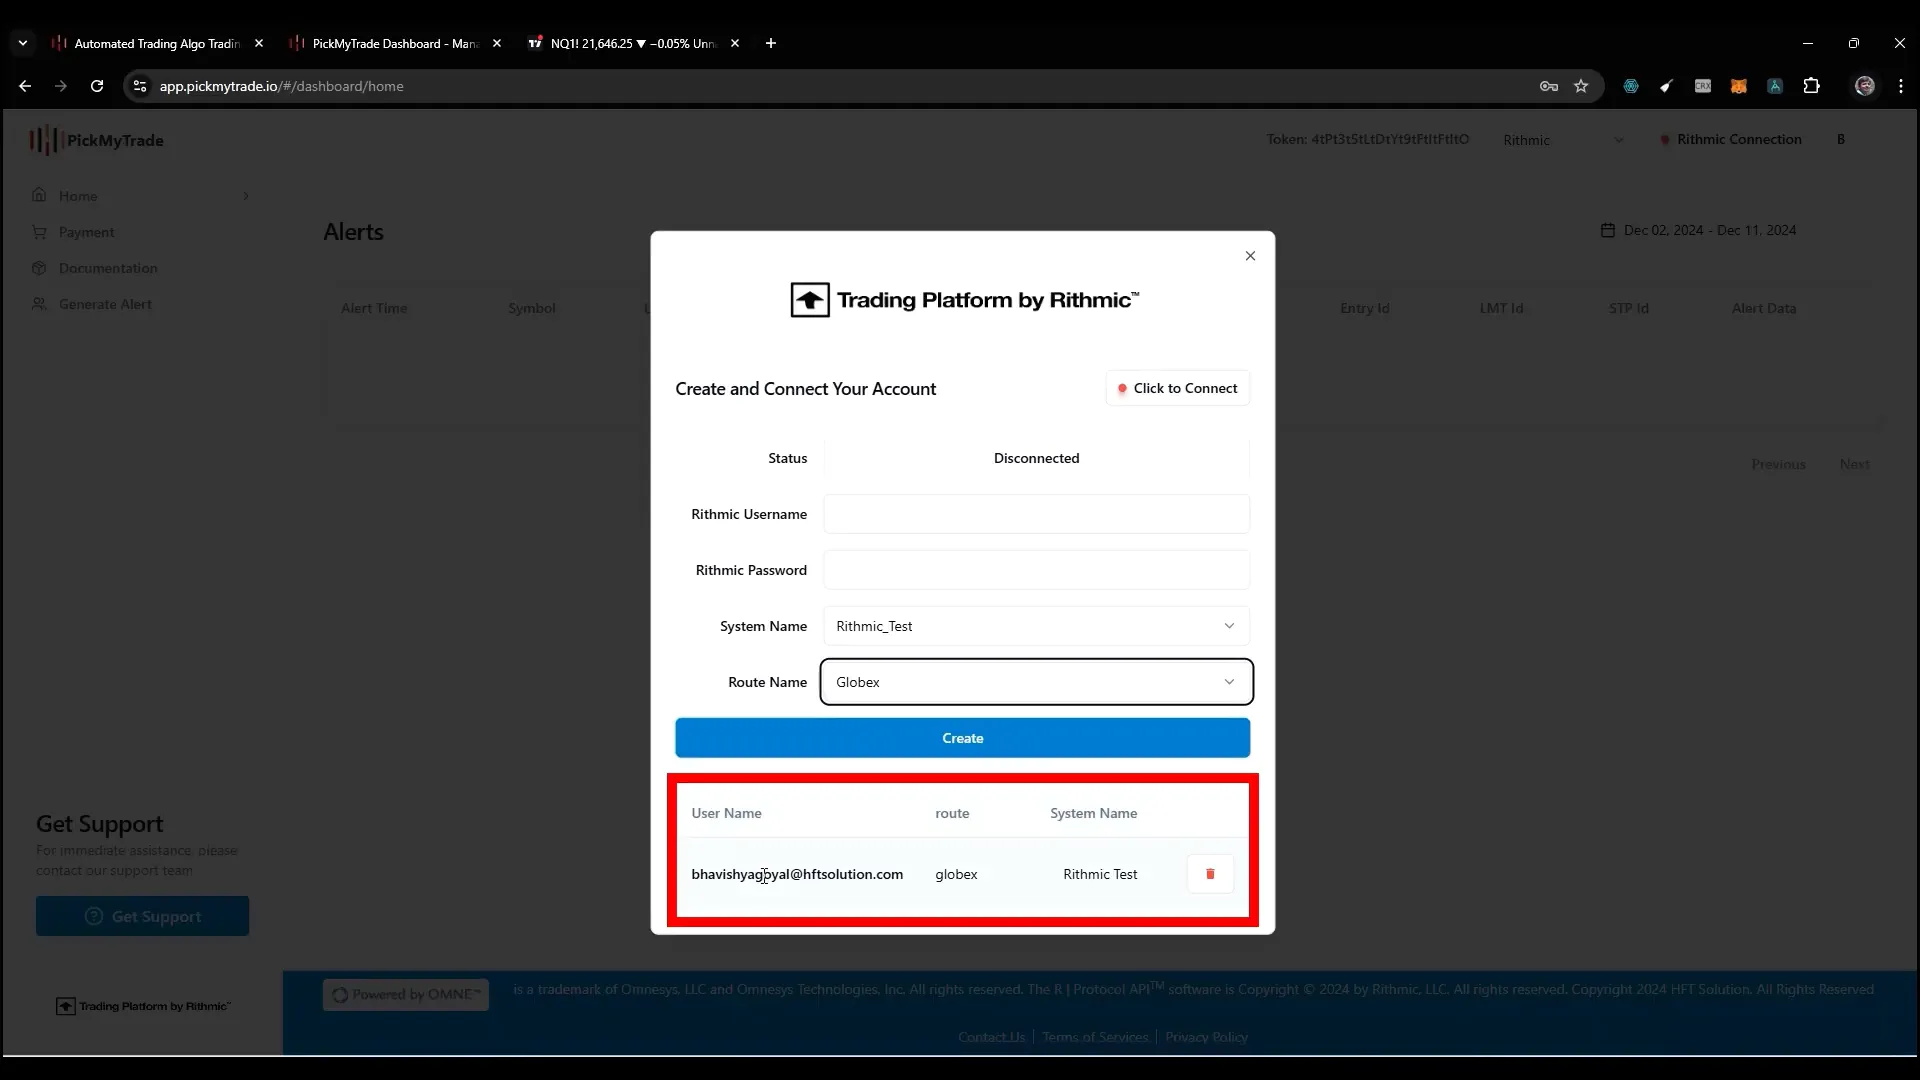
Once you’ve logged in, you will need to set up your Rithmic connection. This involves entering your Rithmic username and password, as well as selecting a system name. If you are using the Rithmic Test or Rithmic 01 routes, the system name will typically default to ‘glowback’. You generally won’t need to make any changes here.
After inputting your credentials, click on the ‘Connect’ button. If the connection is successful, you will be directed to the main dashboard.
Managing Multiple Accounts
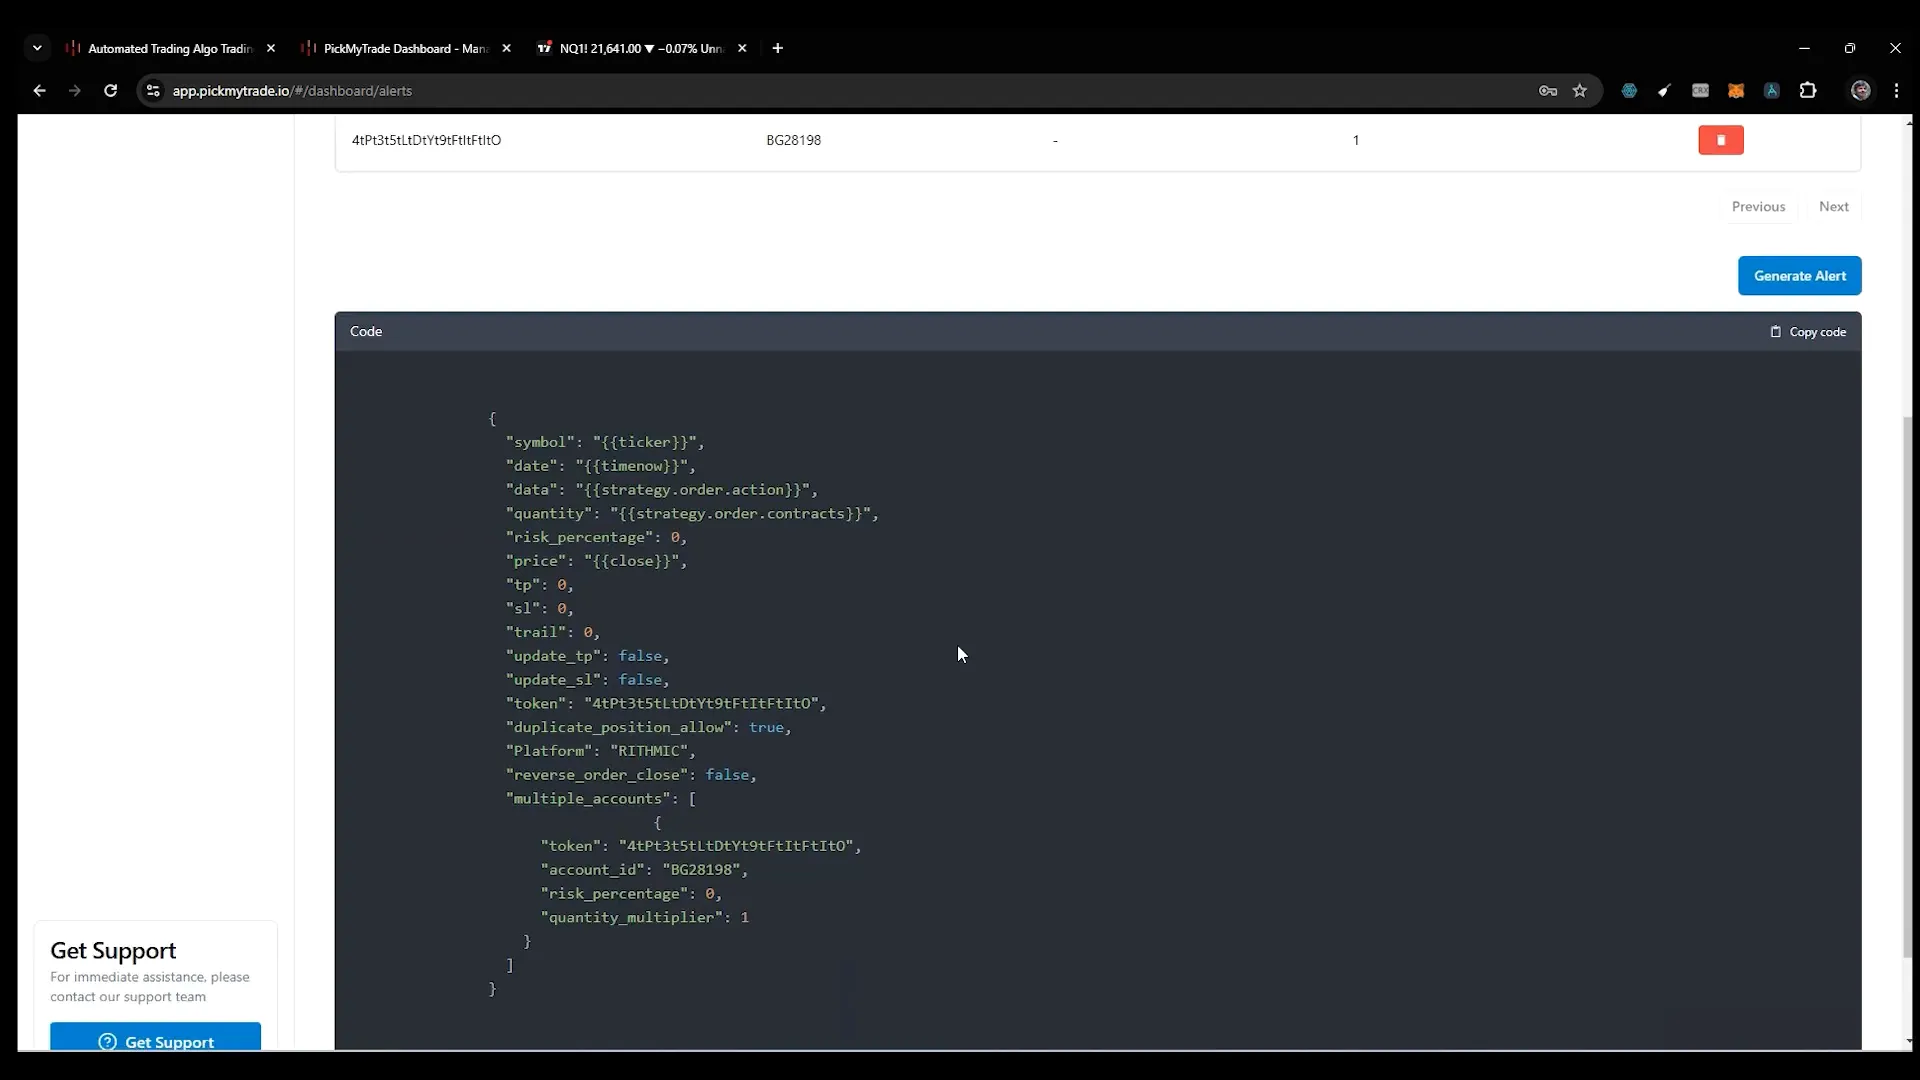
If you wish to automate multiple accounts—whether your own or those of friends or clients—select ‘Yes’ when prompted to add an account. You will need the PickMyTrade token and the Rithmic account name for the account you want to automate. Enter the desired quantity multiplier (usually set to one) and click on ‘Generate Alert’.
Understanding Alert Types
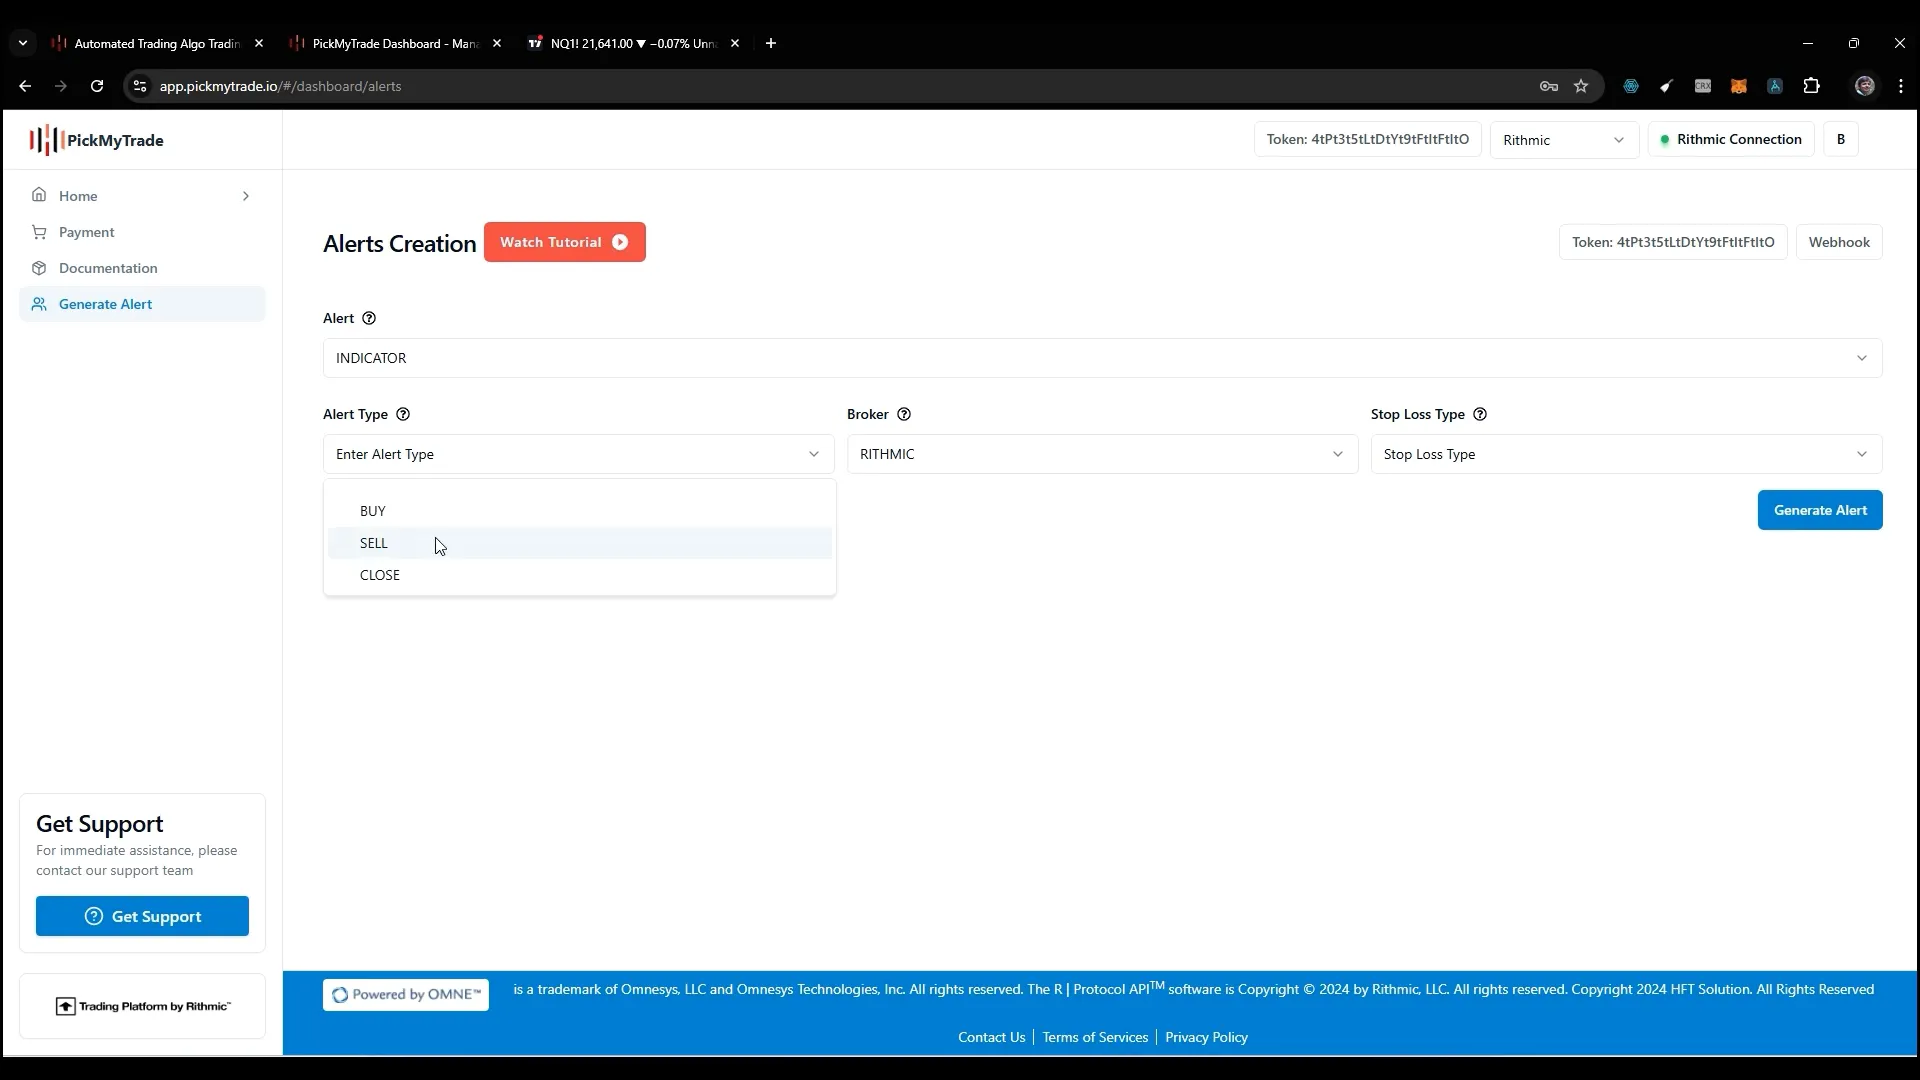
When generating alerts, it’s crucial to understand the different alert types available. The options include:
- Buy: This alert will open a buy position. If there is any existing sell position, it will close that position before placing the buy order.
- Sell: Similar to the buy alert, this will close any existing buy positions before placing a sell order.
- Close: This alert will close all open positions without opening new ones.
Setting Quantity and Risk Parameters
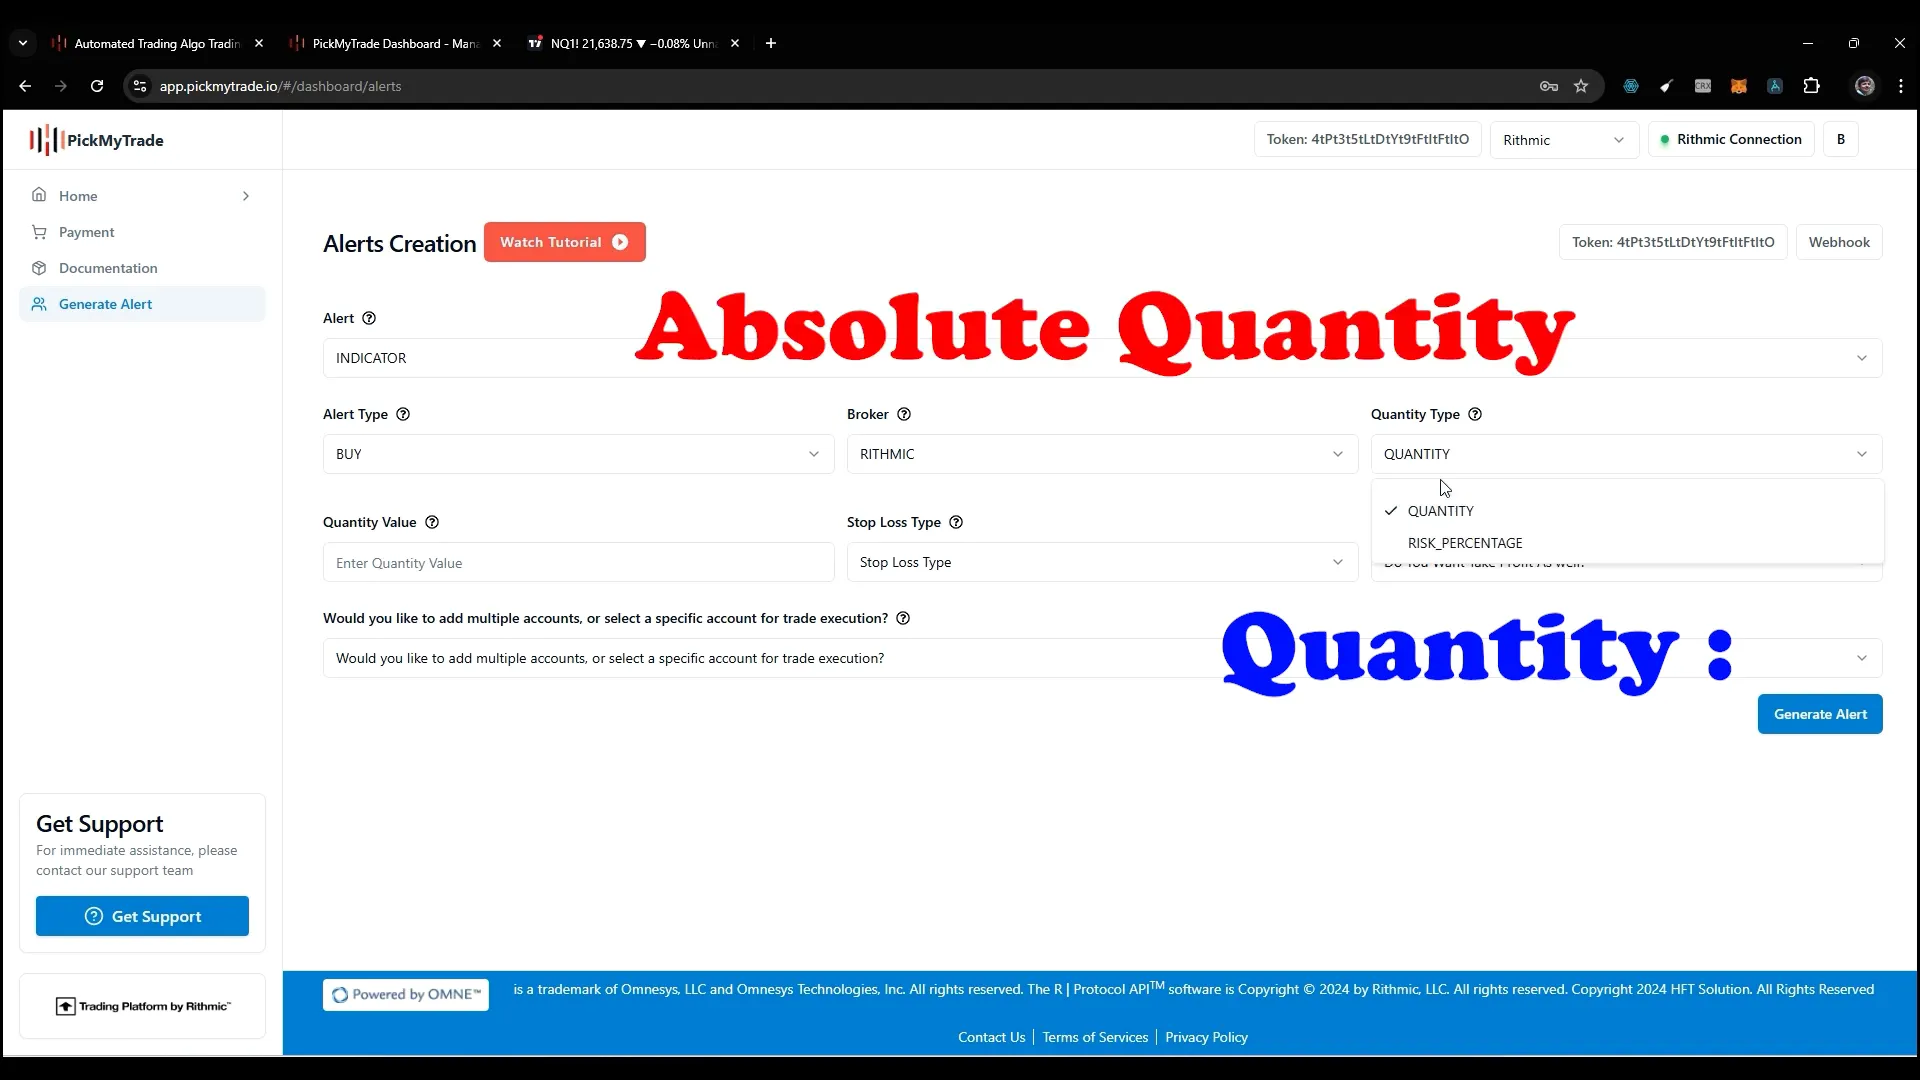
In the Rithmic section, you can choose between two quantity types: absolute quantity and risk percentage. The absolute quantity allows you to specify the exact number of contracts you want to trade, while the risk percentage lets you define how much of your account you’re willing to risk.
For example, if your account has a value of $10,000 and you set a risk percentage of 1%, that means you’re risking $100 on a trade.
Stop Loss Types
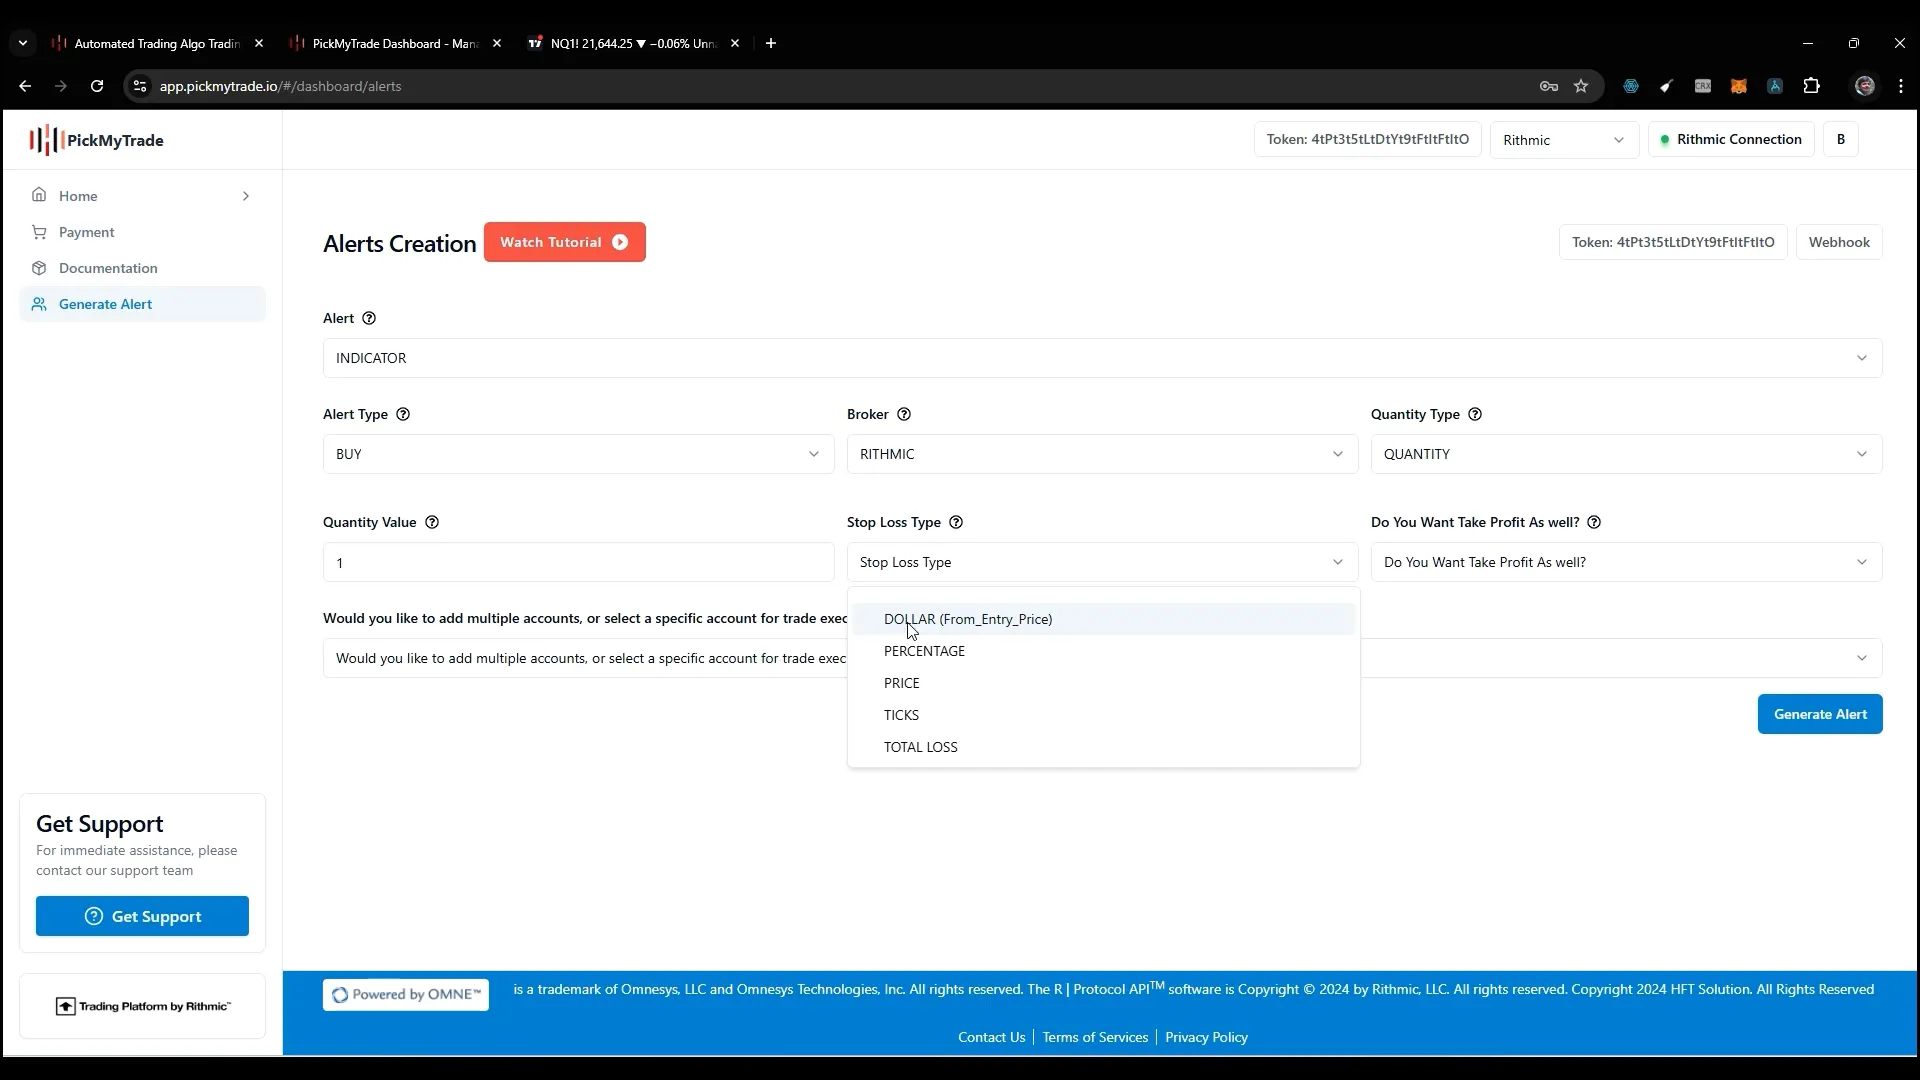
When setting up your stop loss, you now have five options compared to the previous three. The options include:
- Dollar: This will add or subtract a specified amount from your entry price.
- Percentage: You can set a stop loss and take profit based on a percentage of your entry price.
- Price: This allows you to specify an absolute price for your stop loss.
- Ticks: Set your stop loss based on tick values.
- Total Loss: Define the total loss you are willing to accept for one contract.
Generating Alerts in TradingView
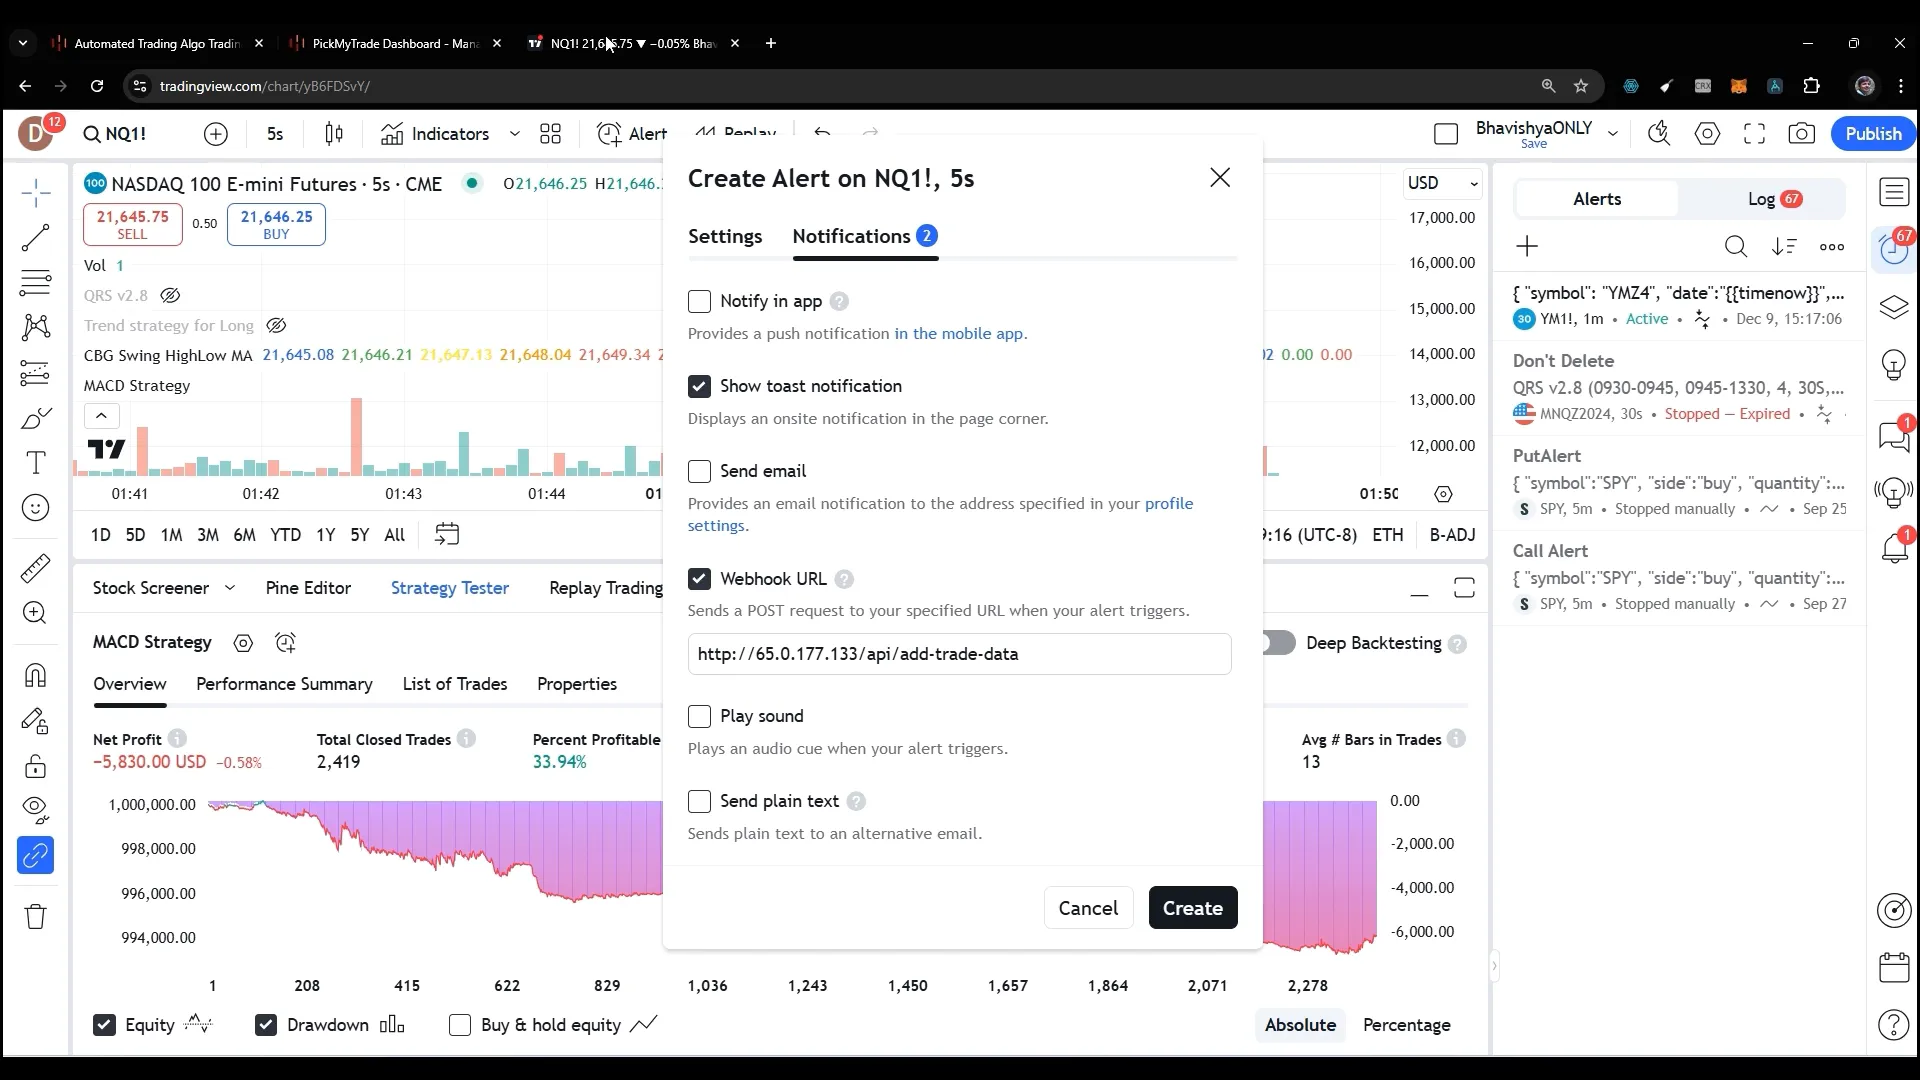
After setting up alerts in PickMyTrade, you will receive a generated code. This code needs to be copied and pasted into TradingView to create the alert. Here’s how:
- Go to TradingView and select the indicator you wish to use, like MACD.
- Navigate to the alert section and paste the copied code into the designated box.
- In the notification settings, enter the webhook URL provided by PickMyTrade.
- Click on ‘Create Alert’ to finalize.
Monitoring Your Trades
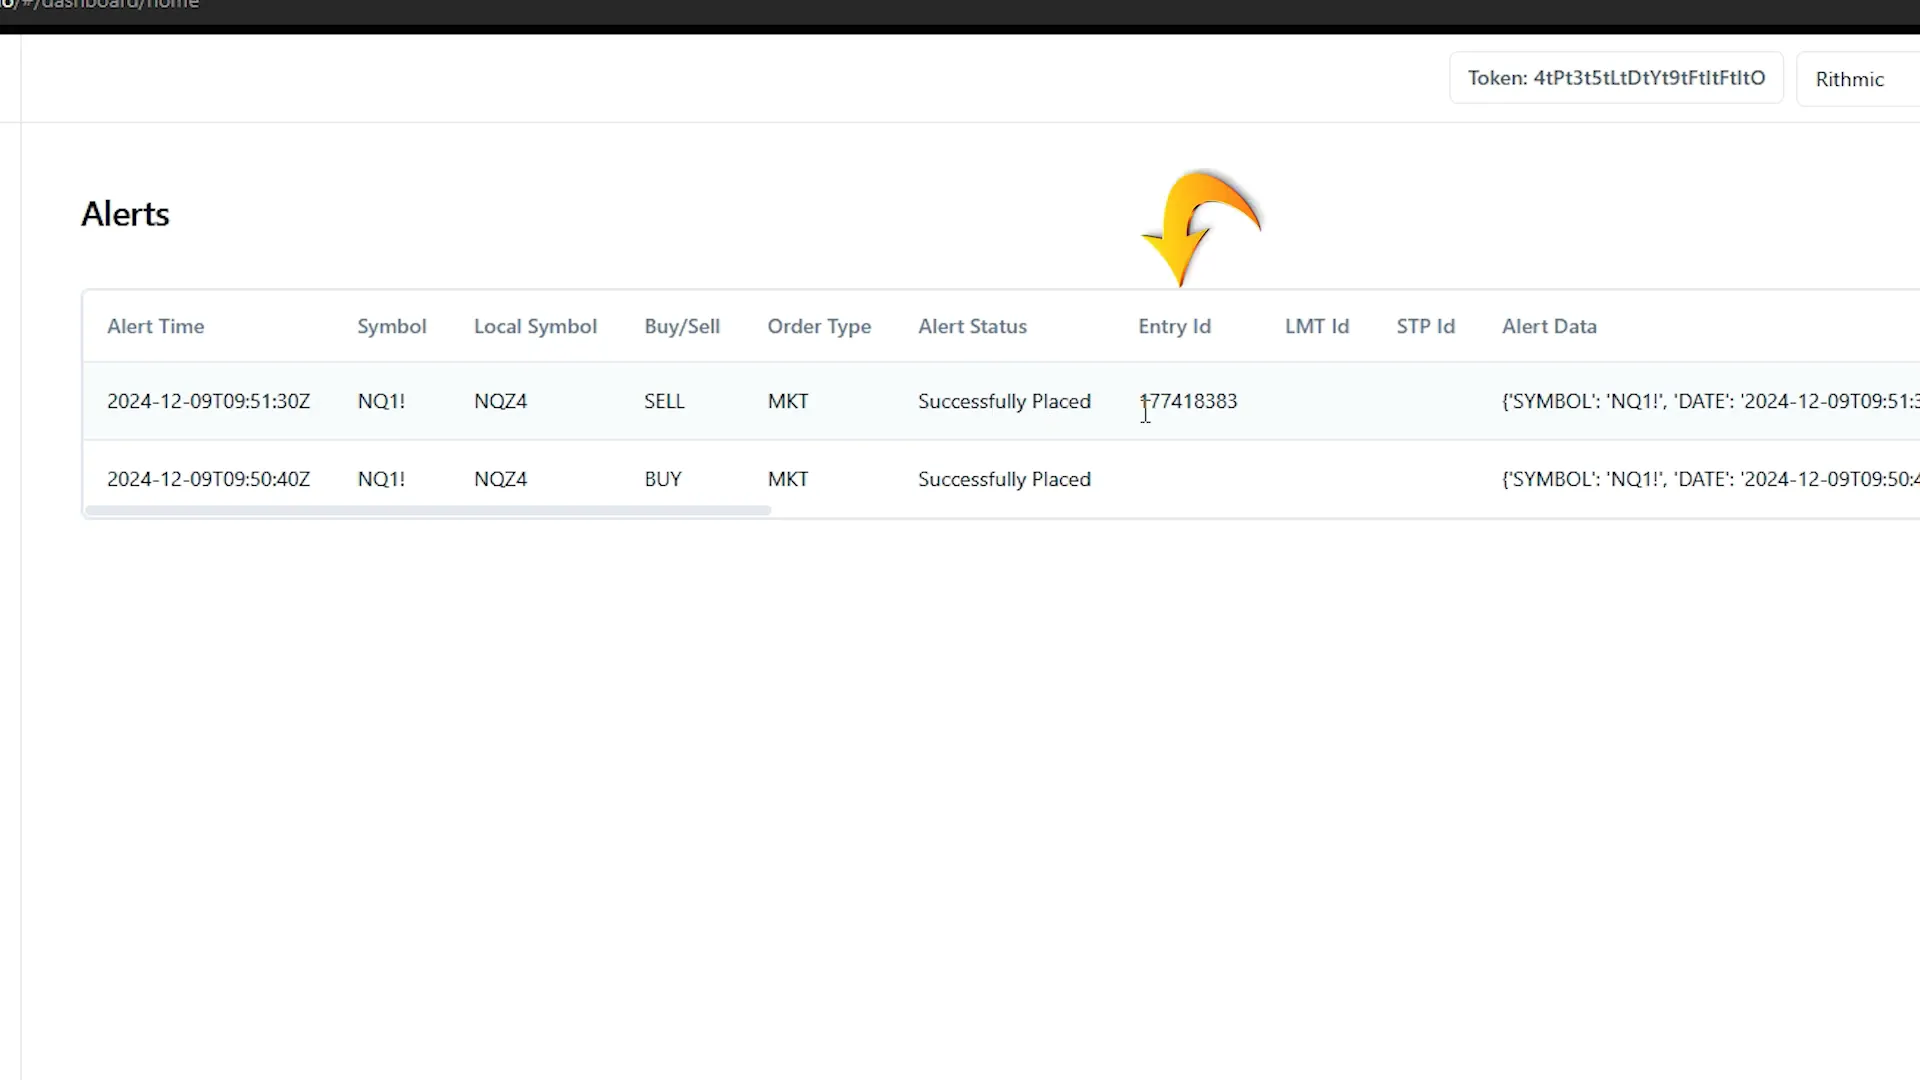
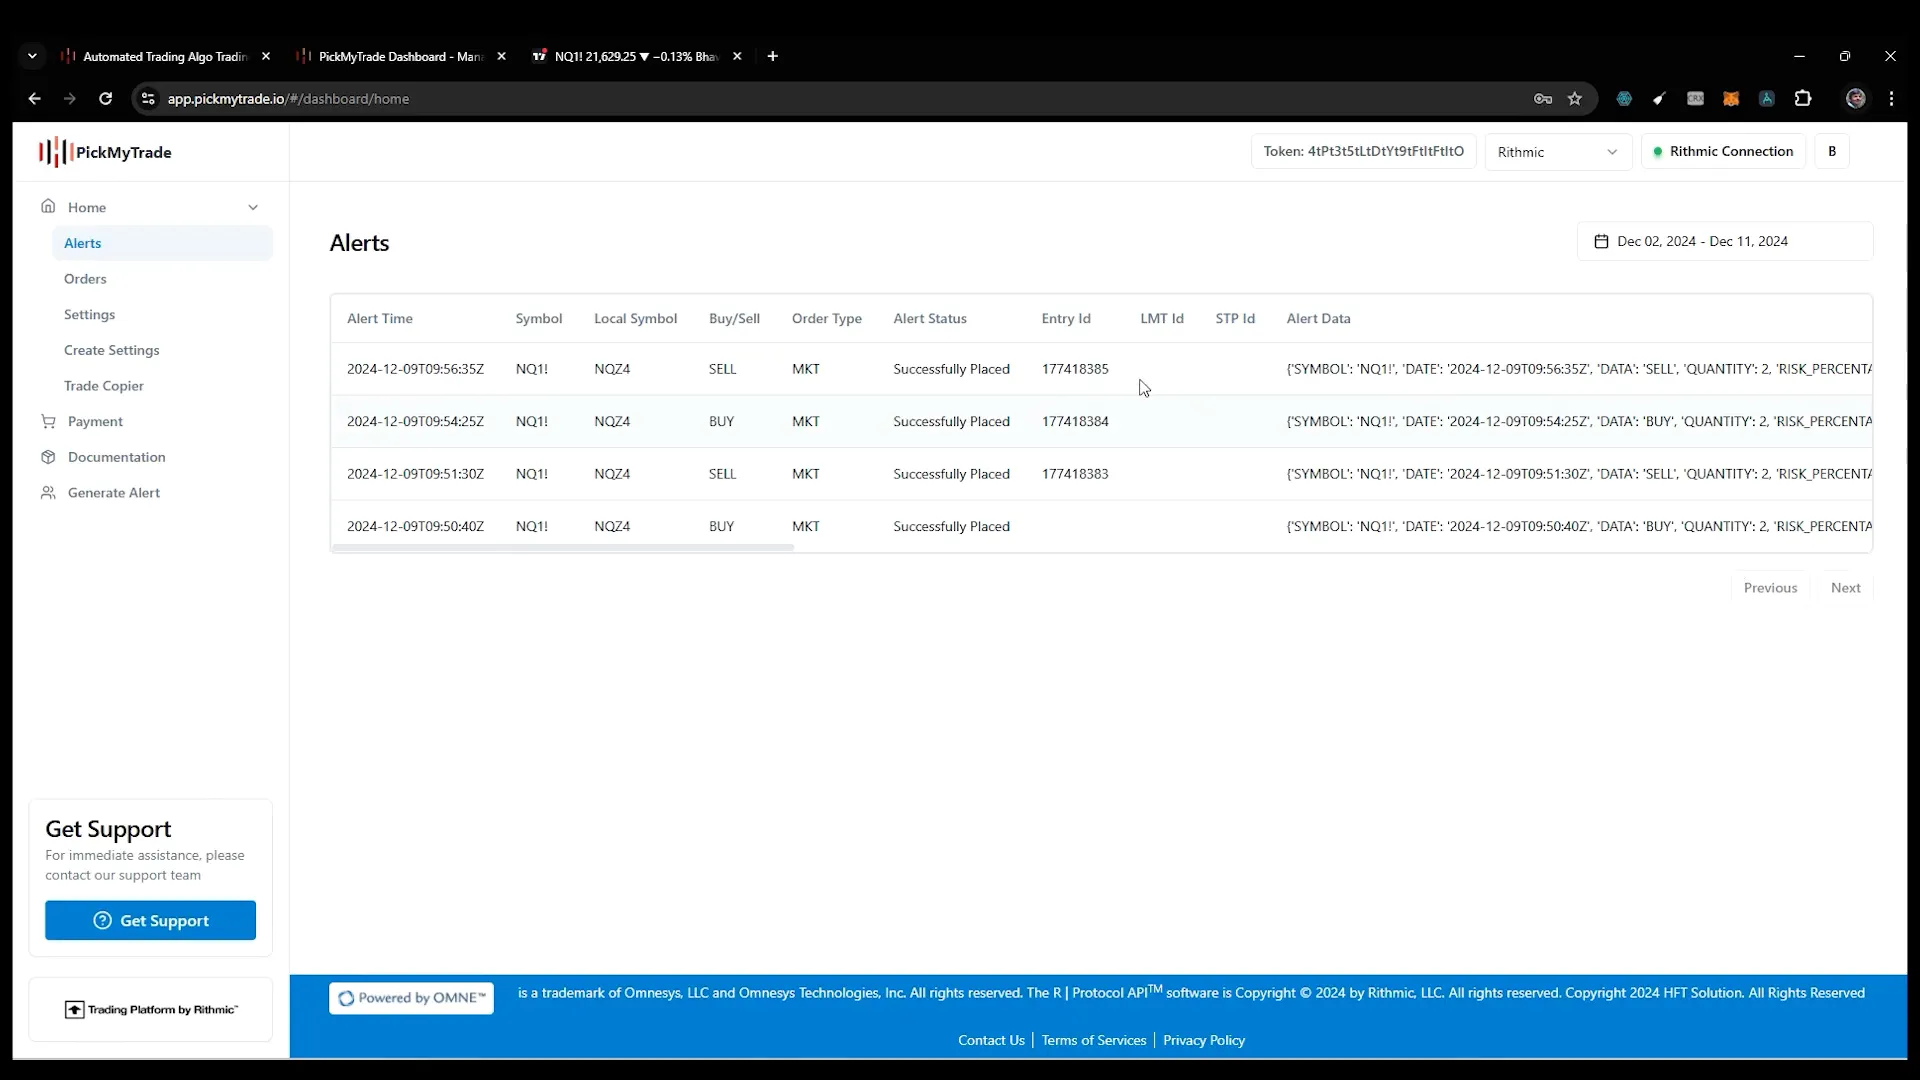
Once the alert is created, you can monitor its status in PickMyTrade. If the alert is successfully placed, you will see the entry ID generated. In case there are issues, you can check TradingView’s log window to ensure your trade was placed correctly.
Settings and Mapping
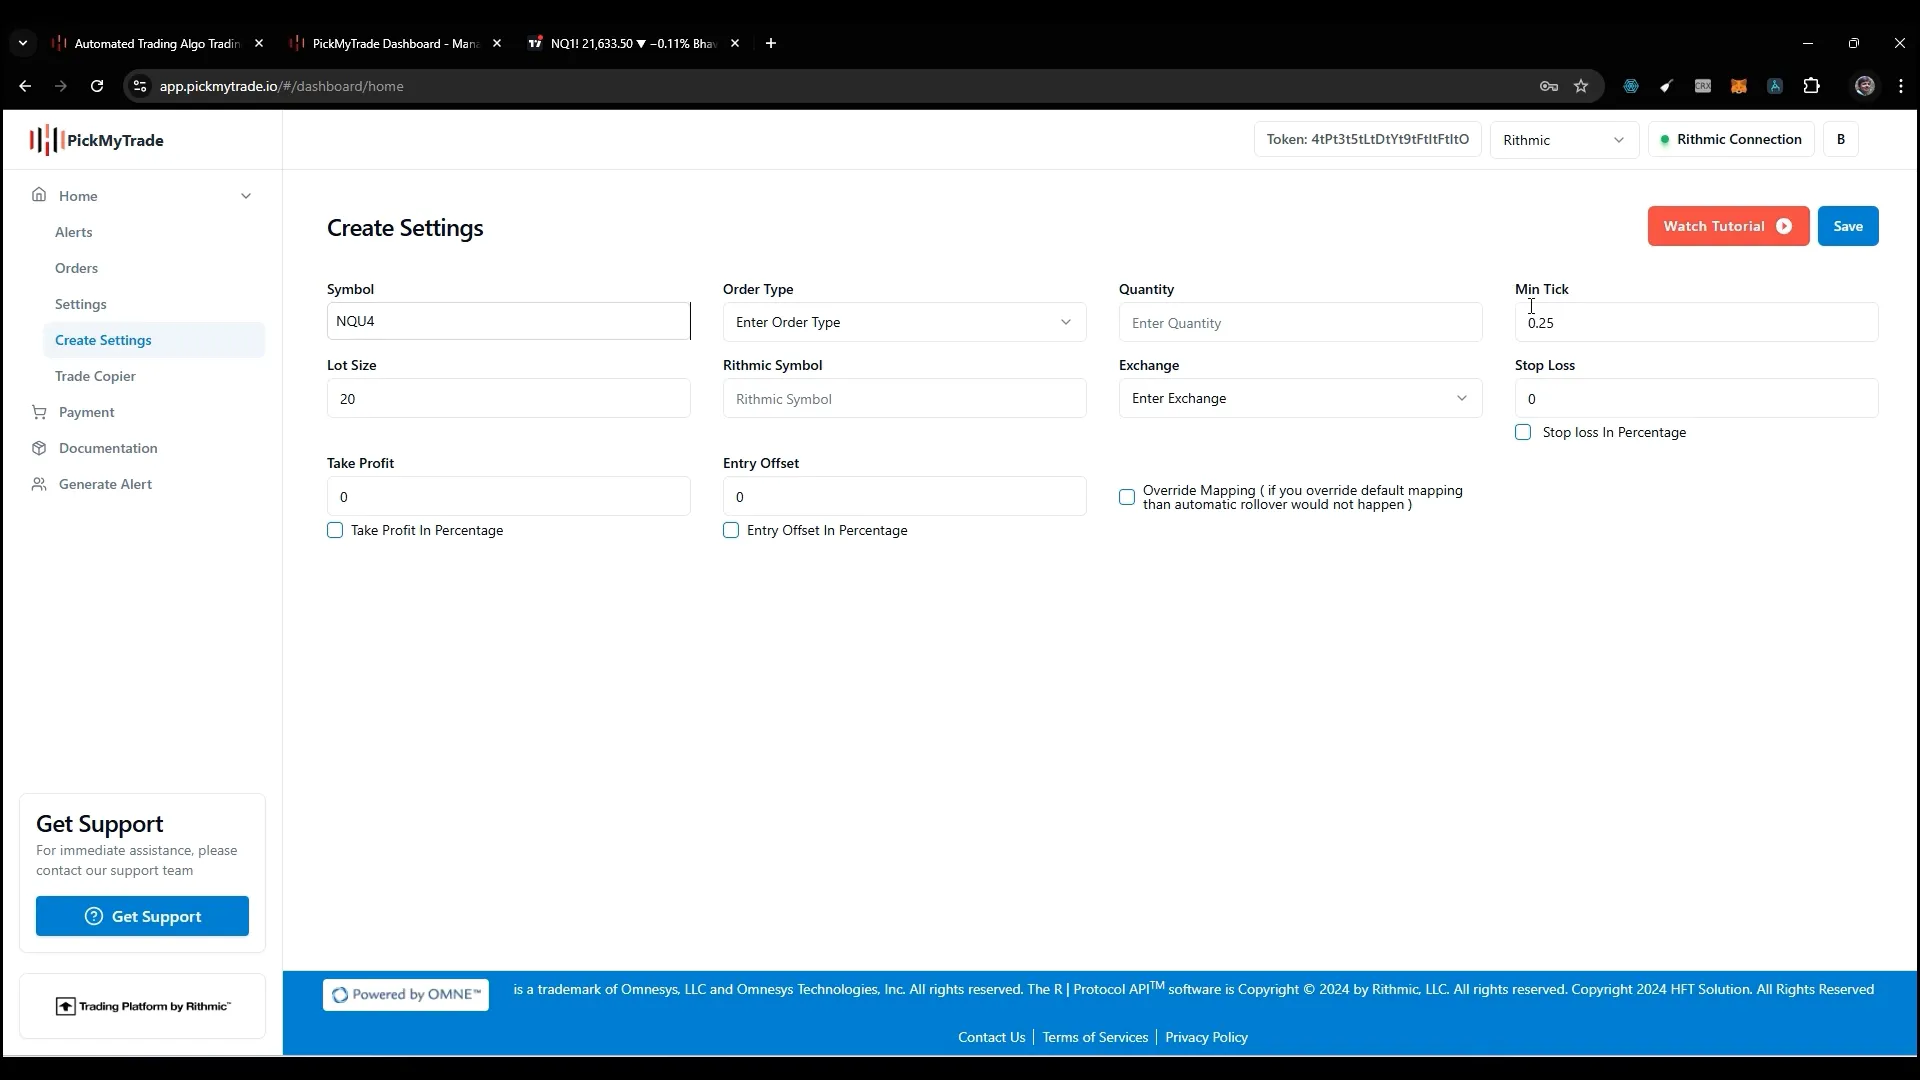
In the settings section, you can manage your stop loss, take profit, and symbol mapping. For example, if you are sending a contract for NQ1 but want to place a trade on NQ Z4, you can set that mapping here. Make sure to specify the market and order quantity correctly.
If you encounter any issues with mapping, you can create a new mapping by entering the symbol, market, and relevant details.
Support and Troubleshooting
If you run into any issues while using PickMyTrade, their support team is available via WhatsApp and email. It’s helpful to provide them with screenshots of your alert status to assist in troubleshooting. If alerts aren’t triggering, check the TradingView log to confirm whether your trade was placed.
Conclusion
Automating your trading with PickMyTrade and Rithmic can significantly enhance your trading efficiency. By connecting your accounts, setting up alerts, and managing your trades effectively, you can take your trading strategy to the next level. Don’t hesitate to reach out for support if you encounter any challenges along the way!
For more information about automated trading solutions, visit PickMyTrade.
PickMyTrade
PickMyTrade specializes in automating trading bots, enabling seamless strategy execution for futures from platforms like TradingView, across well-known brokers such as Tradovate.
