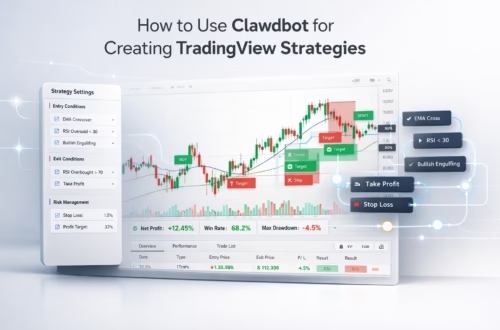
TradingView is an innovative platform that has transformed the trading landscape, particularly for futures trading. With its integration with AMP Futures, traders have access to a powerful suite of tools that can enhance their trading experience. This blog will guide you through the essential features of TradingView when partnered with AMP Futures, enabling you to make informed trading decisions.
Introduction to TradingView
TradingView is a web-based platform that offers advanced charting and trading capabilities. It provides traders with the ability to analyze market trends, execute trades, and manage their portfolios all in one place. The integration with AMP Futures allows users to tap into a wide range of futures markets seamlessly.
With a user-friendly interface, TradingView caters to both novice and experienced traders. It offers various features that enhance trading efficiency and effectiveness. Let’s explore how to get started with TradingView and AMP Futures.
Creating Your Trading Account
To begin using TradingView with AMP Futures, you first need to create an account. Here’s how you can do it:
- Visit the TradingView website.
- Click on the “Sign Up” button located at the top right corner of the homepage.
- Fill in the required information, such as your email address and password.
- Once your account is created, you can log in using your credentials.
After logging in, you can link your AMP Futures trading account to TradingView. This integration allows you to trade directly from the TradingView platform, enhancing your trading experience.
Using a Demo Account
For those new to trading or the platform, using a demo account is a great way to familiarize yourself with TradingView’s features without any financial risk. Here’s how to access your demo account:
- Select your demo account option during the login process.
- Once logged in, you will be redirected to your dashboard, where you can start exploring the platform.
The demo account mirrors the live trading environment, allowing you to practice placing trades and using various features without the fear of losing real money.
Exploring the TradingView Dashboard
Upon accessing your TradingView dashboard, you will find several key components that facilitate your trading experience:
- Chart Area: This is where you can view and analyze different market symbols. You can customize the chart type, time frame, and indicators to suit your trading strategy.
- Trading Panel: Located at the bottom, this panel displays your trade history, current positions, and profit and loss (P&L) in real-time.
- Watch List: On the right side of the dashboard, you can create a watch list of your favorite symbols for quick access and monitoring.
- Drawing Toolbar: This tool allows you to annotate your charts with trend lines, patterns, and other indicators to enhance your analysis.
Customizing Your Charts
One of the standout features of TradingView is its ability to customize charts extensively. Here are some customization options available:
- You can choose from various chart types, including line, bar, and candlestick charts.
- Adjust the time frame for your analysis, from one minute to several months.
- Add indicators to your charts, such as moving averages, RSI, or MACD, to assist in your trading decisions.
- Use drawing tools to mark key support and resistance levels, trends, or patterns that may influence your trading strategy.
Placing Trades on TradingView
Once you are comfortable with the platform, you can begin placing trades. Here’s a simple guide on how to do it:
- Select the symbol you wish to trade from your watch list or by searching for it directly.
- Click on the “Trade” button located on the chart area.
- Choose your order type (e.g., market or limit order) and enter the quantity you wish to trade.
- Review your order details and click “Buy” or “Sell” to execute the trade.
Your active trades will be displayed in the trading panel, where you can monitor their performance in real-time.
Using Advanced Trading Features
TradingView offers several advanced features that can greatly enhance your trading capabilities:
- Brackets and Stops: You can set up bracket orders to manage your risk effectively. This includes placing a take-profit order and a stop-loss order simultaneously.
- Multiple Charts: TradingView allows you to view multiple charts at once. You can set up to eight charts per tab, enabling comprehensive market analysis.
- Real-time Data: With AMP Futures, you receive real-time data for accurate and timely trading decisions.
Utilizing TradingView’s Community and Resources
Engaging with the TradingView community can provide valuable insights and strategies. Here’s how to leverage this resource:
- Join discussions and forums to share your ideas and gain feedback from other traders.
- Access a wealth of educational resources, including tutorials and webinars, to enhance your trading knowledge.
- Follow experienced traders and view their published ideas and strategies for inspiration.
Customer Support and Assistance
If you encounter any issues while using TradingView or have specific questions, AMP Futures offers robust customer support. You can reach out through their support channels, and they will assist you in resolving any concerns.
Conclusion
Integrating TradingView with AMP Futures provides traders with a powerful platform to enhance their trading experience. By utilizing the features discussed, you can effectively analyze markets, execute trades, and manage your portfolio with ease.
Whether you’re a beginner or an experienced trader, TradingView’s tools and resources can help you make informed trading decisions. Start your trading journey with TradingView and AMP Futures today, and unlock the potential of your trading strategies!


After I originally left a comment I seem to have clicked the -Notify me
when new comments are added- checkbox and from now on whenever a comment is added I recieve four emails with the same comment.
There has to be an easy method you can remove me
from that service? Appreciate it!