understanding_auto_trail_orders_pickmytrade
PickMyTrade-Discover how to utilize auto trail orders effectively with Pickmytrade. Enhance your trading strategy and protect your gains while minimizing losses.
PickMyTrade-In the world of trading, leveraging tools effectively can make a significant difference in your trading success. One such tool is the auto trail order, which allows traders to automate their stop-loss strategies. In this comprehensive guide, we will delve into how to create a trail stop using the pickmytrade method, enhancing your trading experience and decision-making process.
PickMyTrade-What is a Trail Stop Order?
A trail stop order is a type of stop-loss order that moves with the market price. It is designed to protect gains by enabling a trade to remain open and continue to profit as long as the market price is moving in a favourable direction. However, if the market price changes direction by a specified amount, the order will close the trade. This method is particularly useful for traders looking to maximise profits while minimising potential losses.
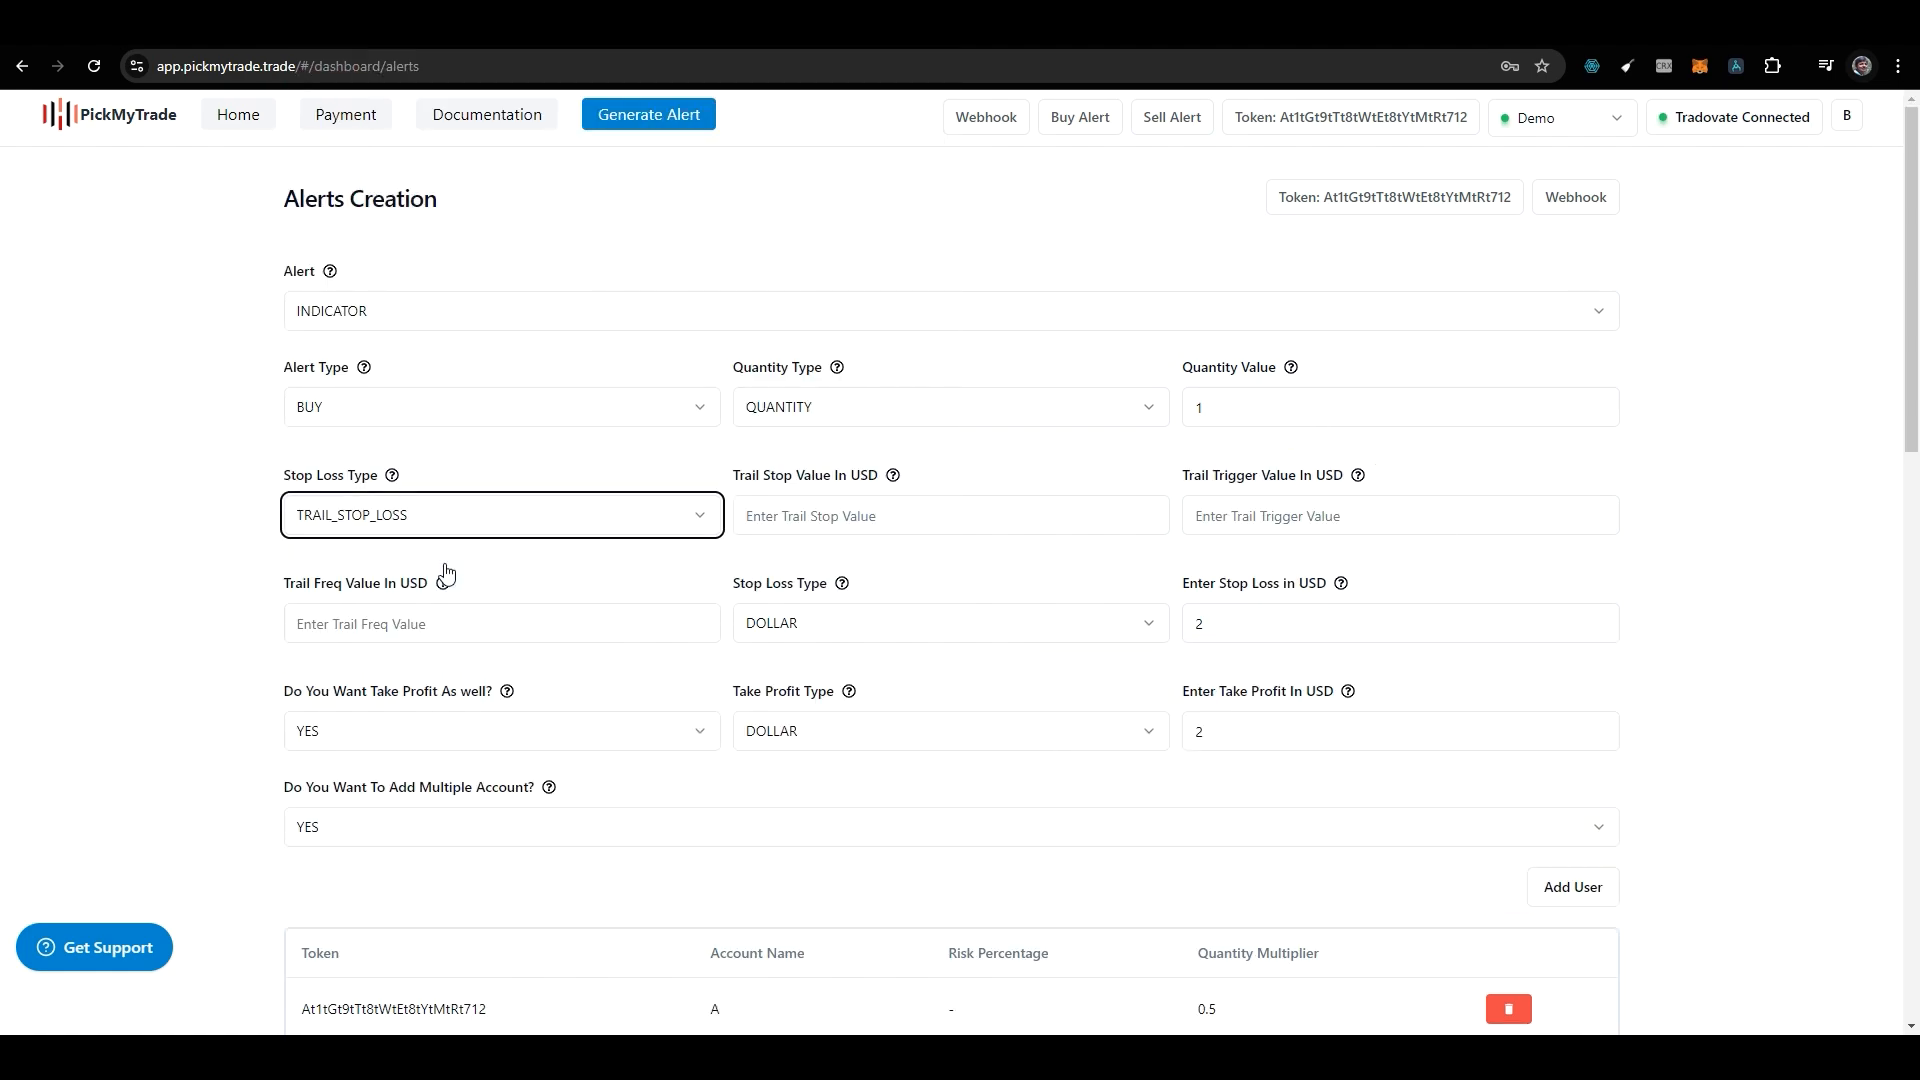
Setting Up Your Trail Stop Loss
To set up a trail stop loss, you need to follow a series of steps to ensure that your parameters are correctly defined. Let’s break down the process:
Step 1: Selecting the Trail Stop Loss Type
Begin by selecting the trail stop loss option in your trading platform. This selection is crucial, as it dictates how your stop-loss will function. You must also specify the stop-loss type to ensure that the order behaves as expected. Once you select your stop loss, you will be prompted to fill in various fields.
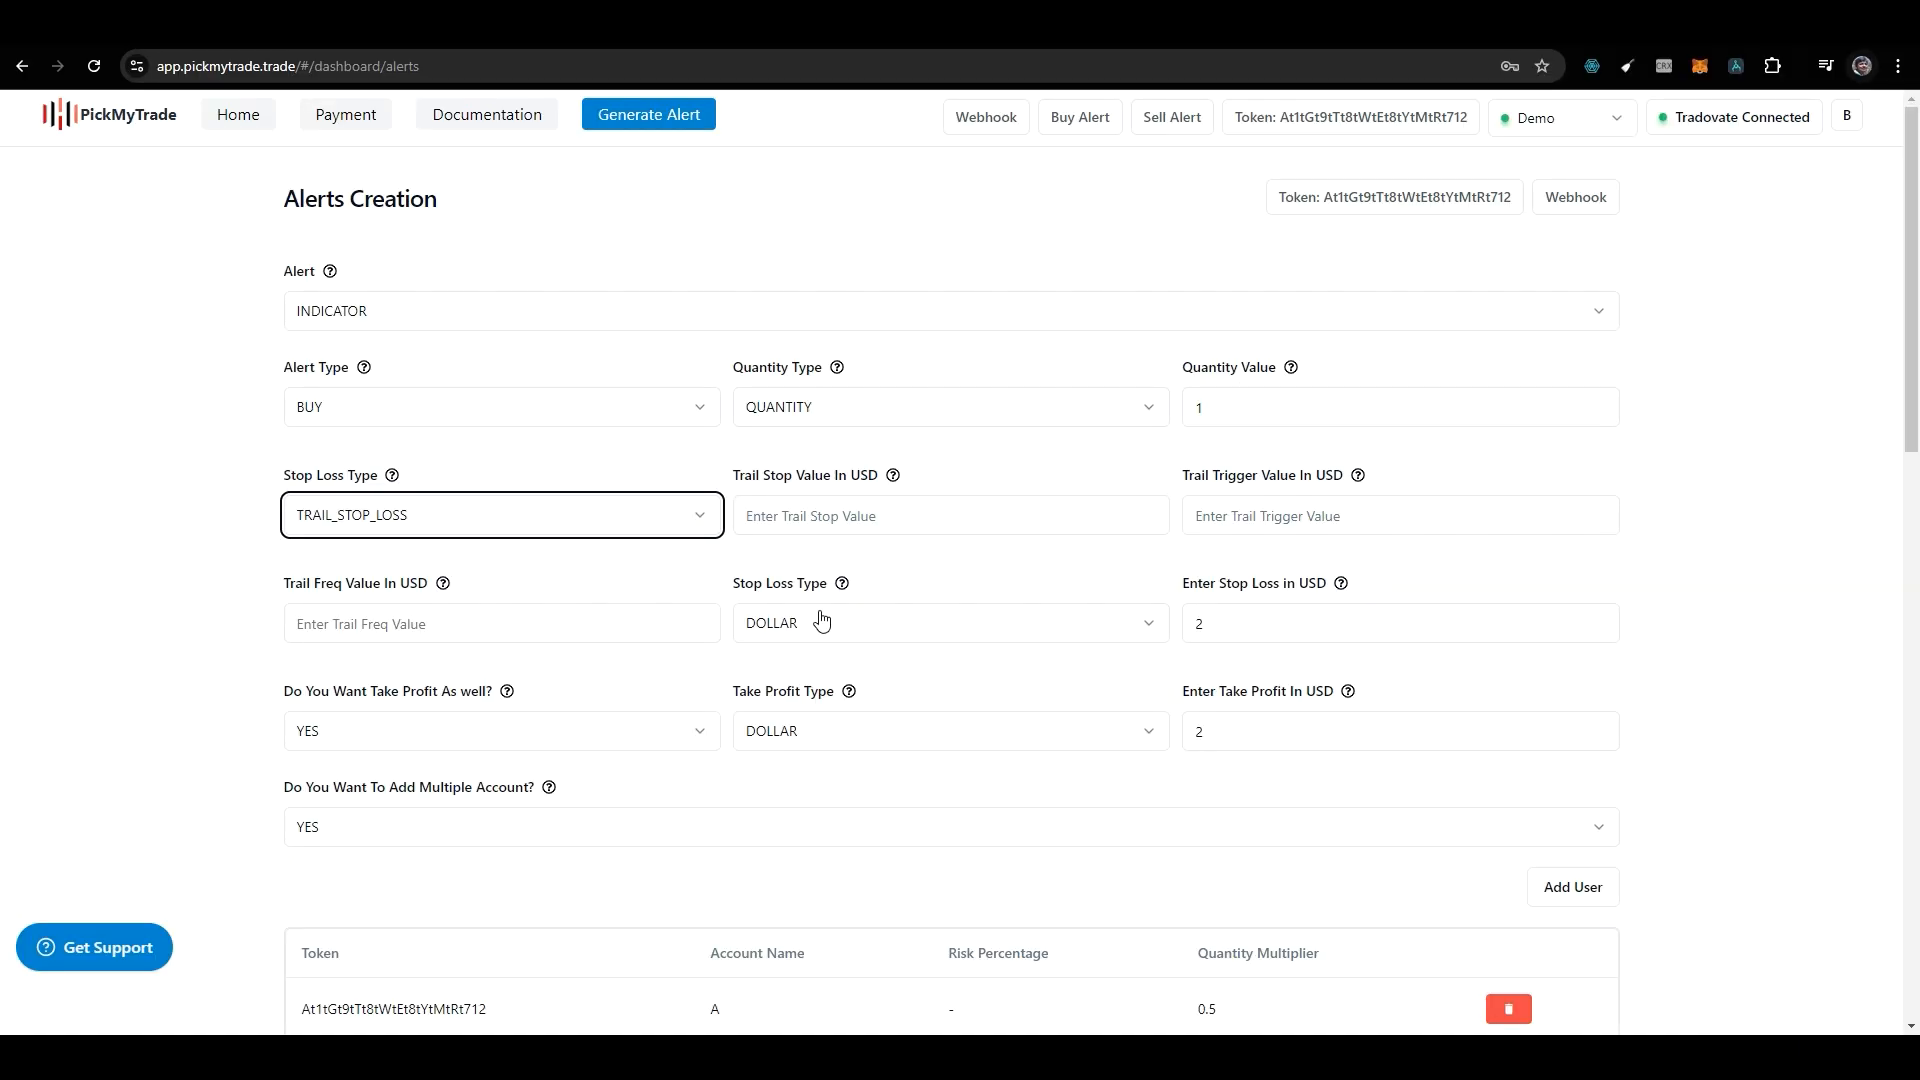
Step 2: Defining the Trail Stop Loss Value
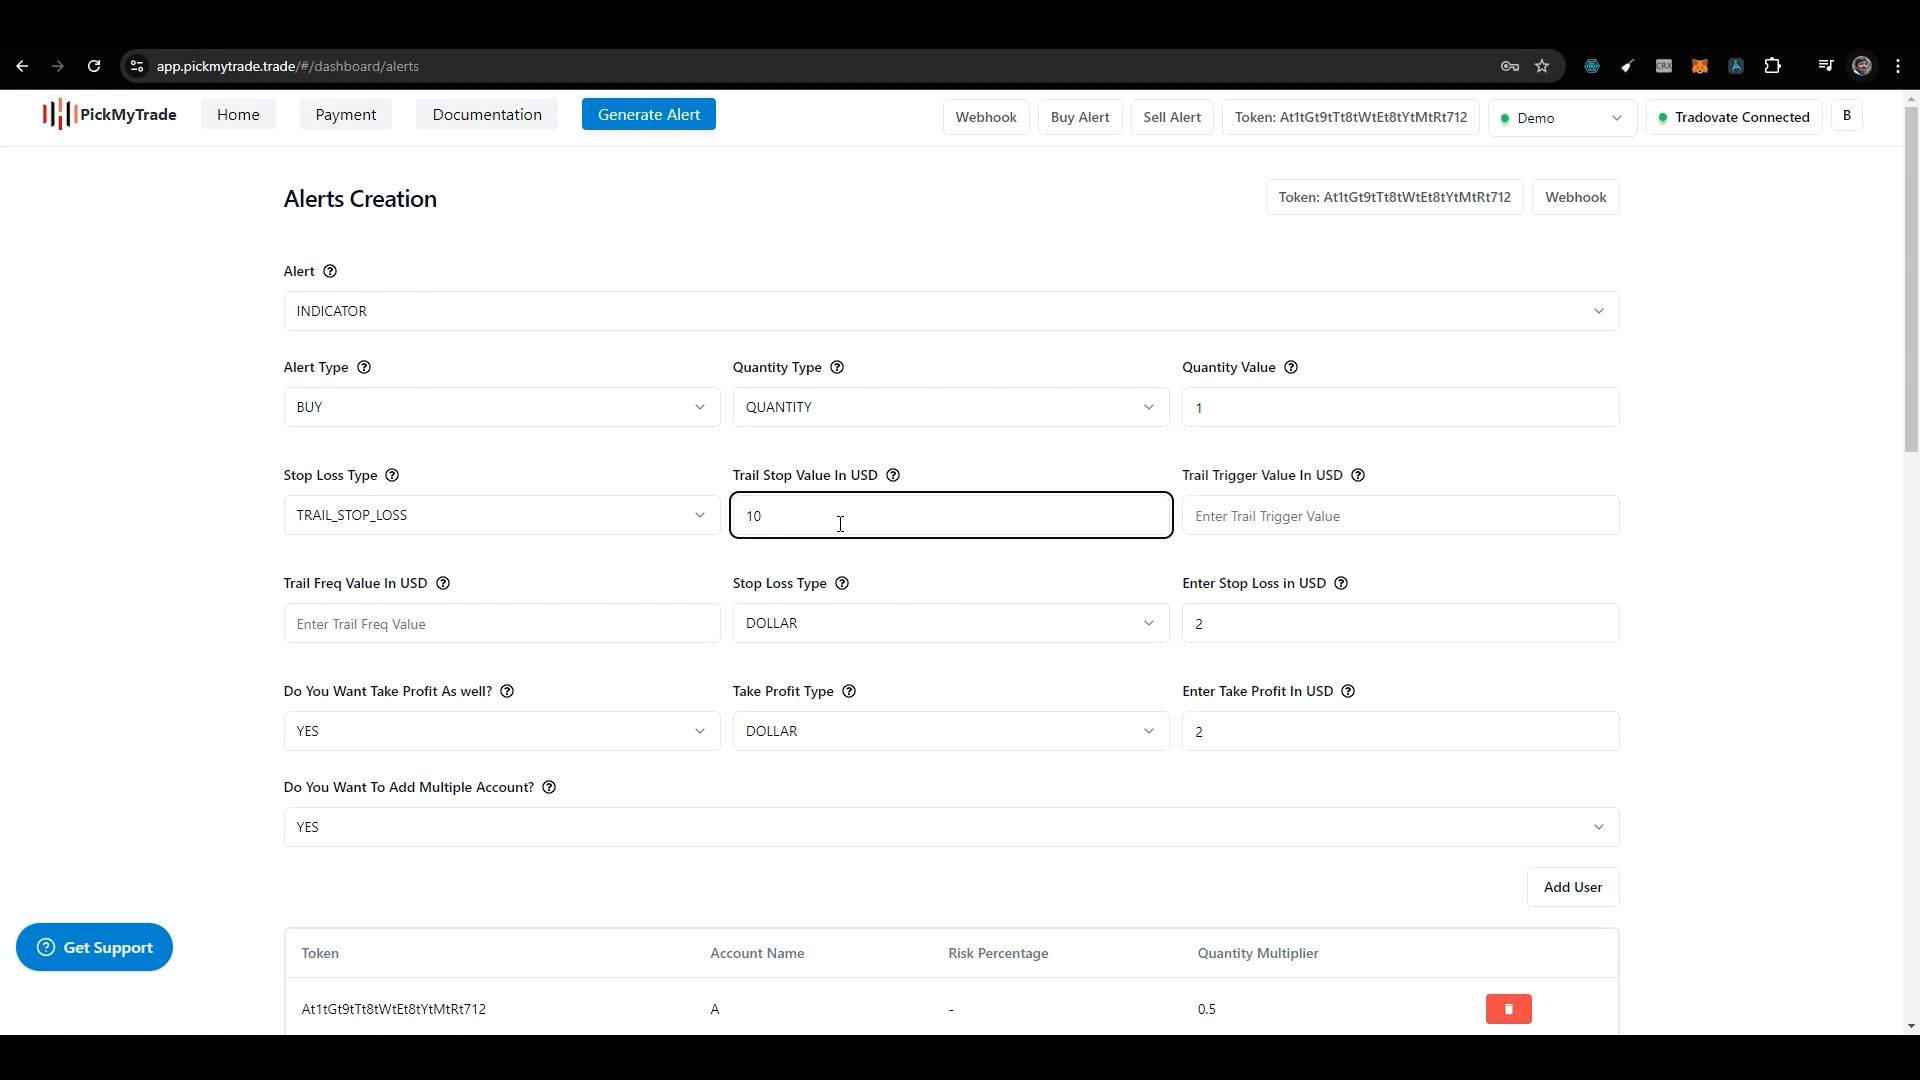
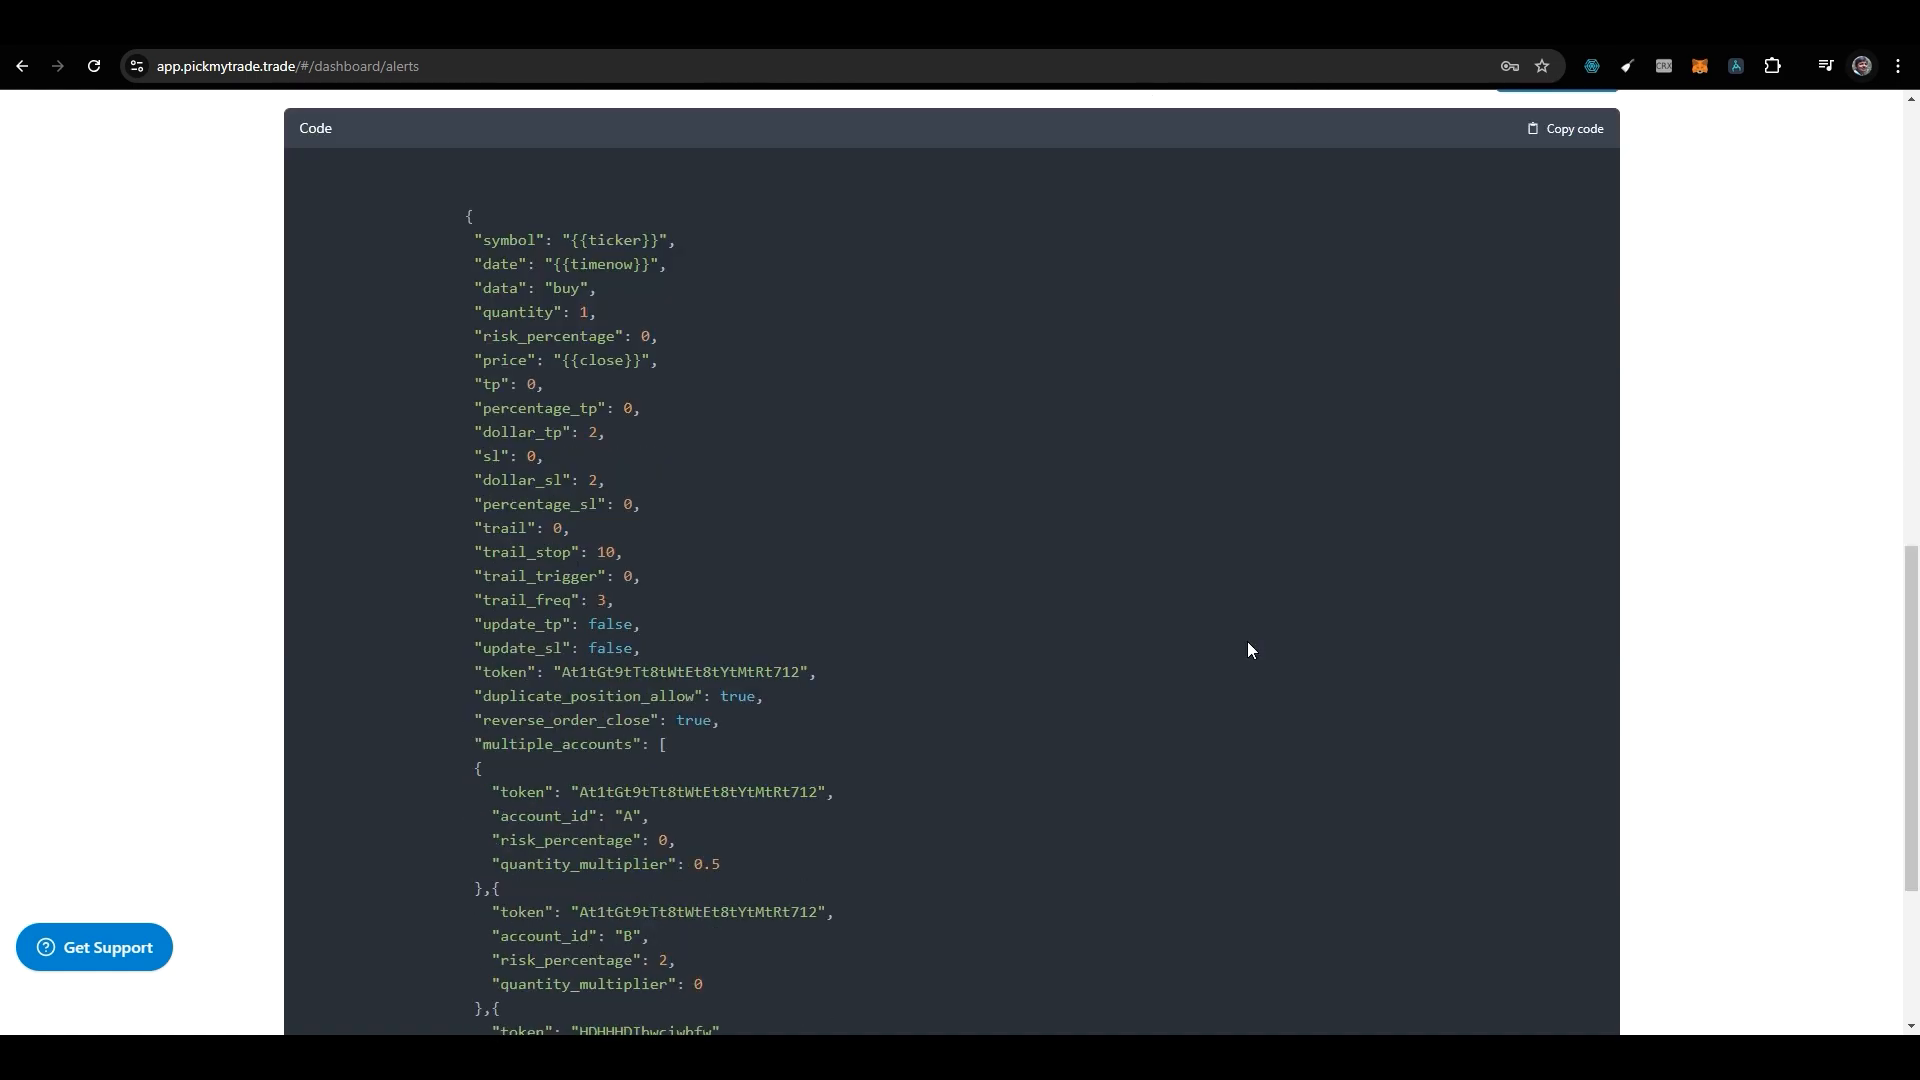
The next step is to define the trail stop loss value in USD. This value represents the distance in dollars that your trailing stop will maintain relative to the current market price. For instance, if you set your trail stop loss value at $10, and your current price is $100, your trailing stop will initially be set at $90.
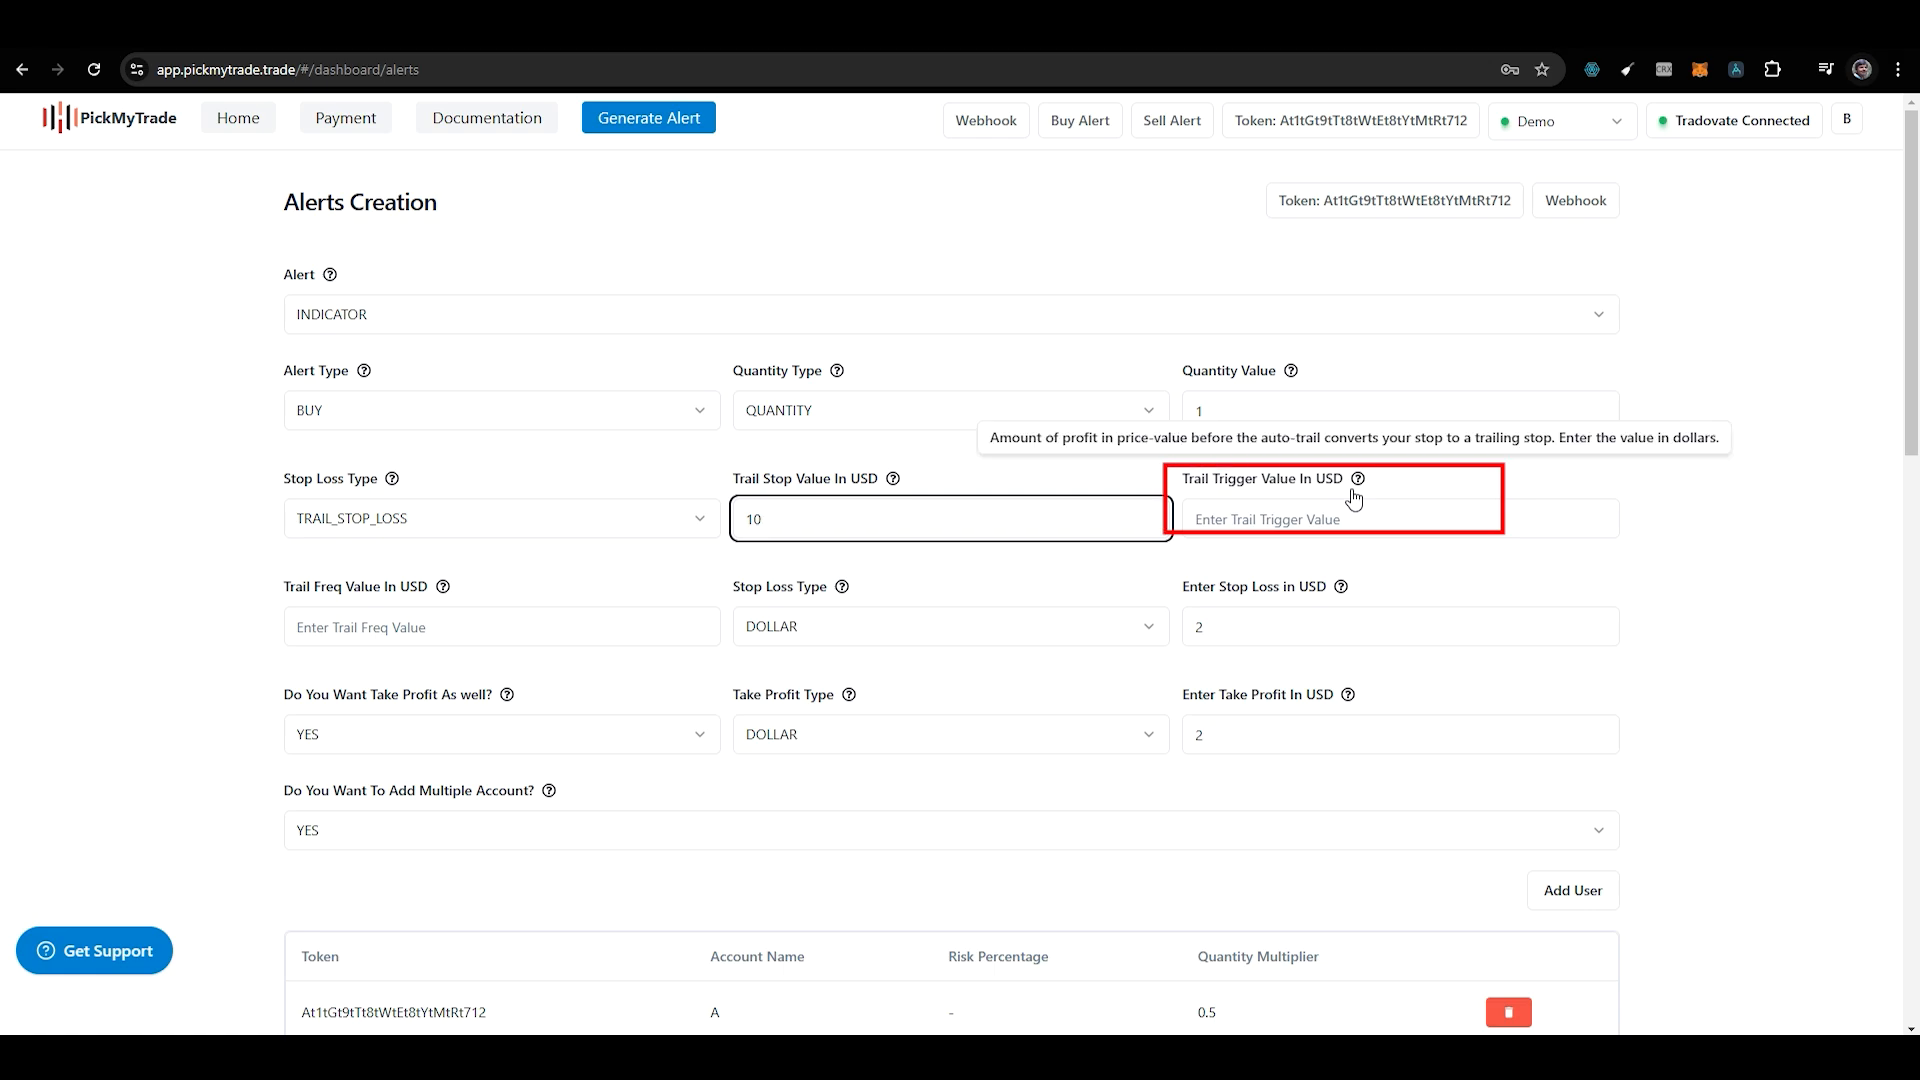
Step 3: Setting the Trail Trigger Value
The trail trigger value determines when your trailing stop will activate. If you set this value at $10, your trailing stop will begin to function only after you have secured a profit of $10. This feature ensures that you do not start trailing until you’re in a profit position.
Step 4: Configuring the Trail Frequency
Trail frequency is another critical parameter. It dictates the amount of price change needed before your trailing stop moves. For example, if you set the trail frequency to $2, the trailing stop will only adjust if the market price moves in your favour by $2. This parameter can help manage how aggressively your stop loss follows the market price.

Step 5: Generating the Alert
Once you have filled in all the necessary fields, the next step is to generate the alert. This alert will notify you when your trailing stop conditions are met. After generating the alert, copy the code provided and paste it into your TradingView platform. Ensure that the alert is correctly set up by looking for a green tick mark indicating everything is in order.
PickMyTrade-Understanding Auto Trail in TradingView
Many traders often have confusion regarding how the auto trail feature works across different platforms. It’s vital to understand that while the basic principles remain the same, the specific implementation can vary. In the case of TradingView and Tradovate, the auto trail operates by placing an initial stop-loss order, followed by setting the profit trigger and frequency.

Common Issues and Troubleshooting
Even with the best setups, traders sometimes encounter issues with their trailing stops not functioning as intended. If you are running a demo account without market data permission, you may not see accurate results. Some users have reported that their trailing stops do not activate, which can often be traced back to misconfigurations in the alert settings or insufficient market data.
For further clarification on how auto trail works, you can refer to the official Tradovate documentation. This resource provides detailed insights into the auto trail feature and can help resolve common queries.
Conclusion
Utilising a trail stop loss can significantly enhance your trading strategy, allowing you to protect profits while minimising losses. By following the steps outlined in this guide, you can effectively set up your trailing stops using the pickmytrade method. Remember to always double-check your settings and ensure that you are fully aware of how the auto trail feature works across different trading platforms.
FAQs
What is the key benefit of using a trail stop loss?
The primary benefit of using a trail stop loss is that it allows traders to lock in profits while providing a cushion against market reversals. This strategy maximises the potential for gains while managing risks effectively.
How do I know if my trailing stop loss is set up correctly?
After setting up your trailing stop loss, ensure that you receive a confirmation alert in TradingView. Look for a green tick mark that indicates your alert is correctly configured. If you experience discrepancies, review your settings and consult documentation for troubleshooting.
Can I adjust my trailing stop loss after it is set?
Yes, you can adjust your trailing stop loss parameters at any time. However, be cautious when making adjustments, as this could affect your existing trades and profit potential.
Where can I learn more about auto trail orders?
For more information on auto trail orders and their implementation, consider watching detailed tutorials on platforms like YouTube or exploring comprehensive guides available on trading forums. These resources can provide additional insights and help you refine your trading strategies.
By mastering the use of trail stop losses, you can take significant steps towards becoming a more effective trader. Happy trading!


