In today’s trading environment, efficiency and automation are paramount. One of the most effective ways to achieve this is through PickMyTrade, a platform that allows traders to automate their accounts seamlessly. This guide will provide you with a comprehensive understanding of how to place trades in multiple Tradovate sub-accounts using a single alert from TradingView. By the end of this blog, you’ll be equipped with the knowledge to enhance your trading strategy significantly.
Table of Contents
- Understanding the Basics of PickMyTrade and Tradovate
- Setting Up Your PickMyTrade Account
- Connecting Your Tradovate Accounts
- Inviting Your Friend’s Accounts
- Generating Alerts for Automated Trading
- Setting Up Webhooks for Notifications
- Benefits of Using PickMyTrade
- Common Questions About Using PickMyTrade
- 1. How do I find my PickMyTrade token?
- 2. Can I automate trades for multiple clients?
- 3. What happens if I want to change a sub-account name?
- 4. Is there a limit to the number of accounts I can connect?
- Conclusion
Understanding the Basics of PickMyTrade and Tradovate
Before diving into the specifics, let’s clarify the two key components involved in this process: PickMyTrade and Tradovate. PickMyTrade is an automated trading platform that enables users to execute trades across various accounts efficiently. Tradovate, on the other hand, is a trading platform that offers advanced trading tools and features for futures trading.
Combining these two platforms allows traders to manage multiple accounts effortlessly. For instance, if you have several sub-accounts under a single Tradovate login, you can automate trades across all of them using a single alert from TradingView. This capability is especially beneficial for traders who manage multiple accounts for various strategies or clients.
Setting Up Your PickMyTrade Account
The first step in automating your trading process is to set up your PickMyTrade account. If you haven’t done this yet, follow these steps:
- Visit the PickMyTrade website and create an account.
- Once your account is created, navigate to your dashboard where you will find your PickMyTrade token.
- Make a note of your token, as you will need it to link your Tradovate accounts.
Connecting Your Tradovate Accounts
After setting up your PickMyTrade account, the next step is to connect your Tradovate accounts. Here, we’ll use an example to illustrate the process. Suppose you have two sub-accounts named AP1 and AP2 under your Tradovate login, and your friend Andrew has two sub-accounts named FT1 and FT2 under his account.
To connect these accounts, follow these steps:
- Ask your friend for his PickMyTrade token and the names of his sub-accounts.
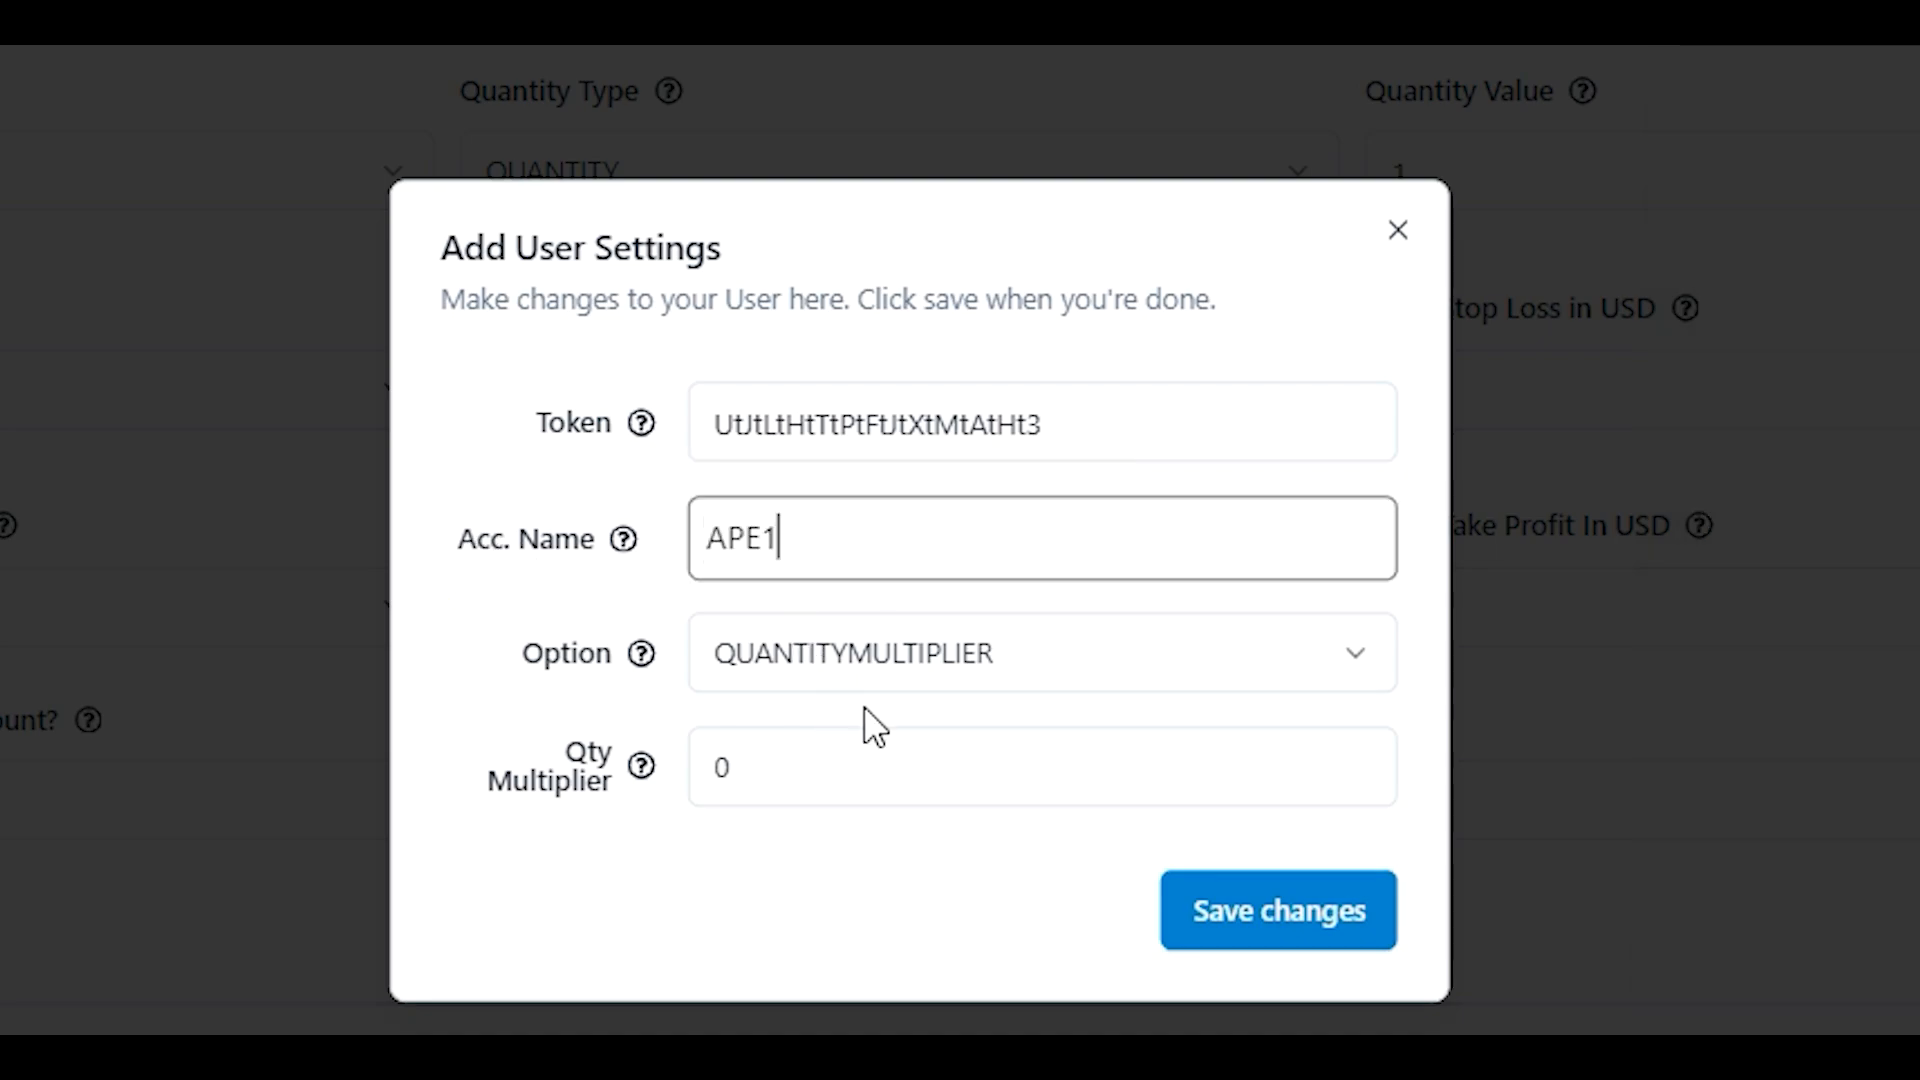
- Log in to your PickMyTrade account and navigate to the section where you can add users.
- Enter your PickMyTrade token in the designated section.
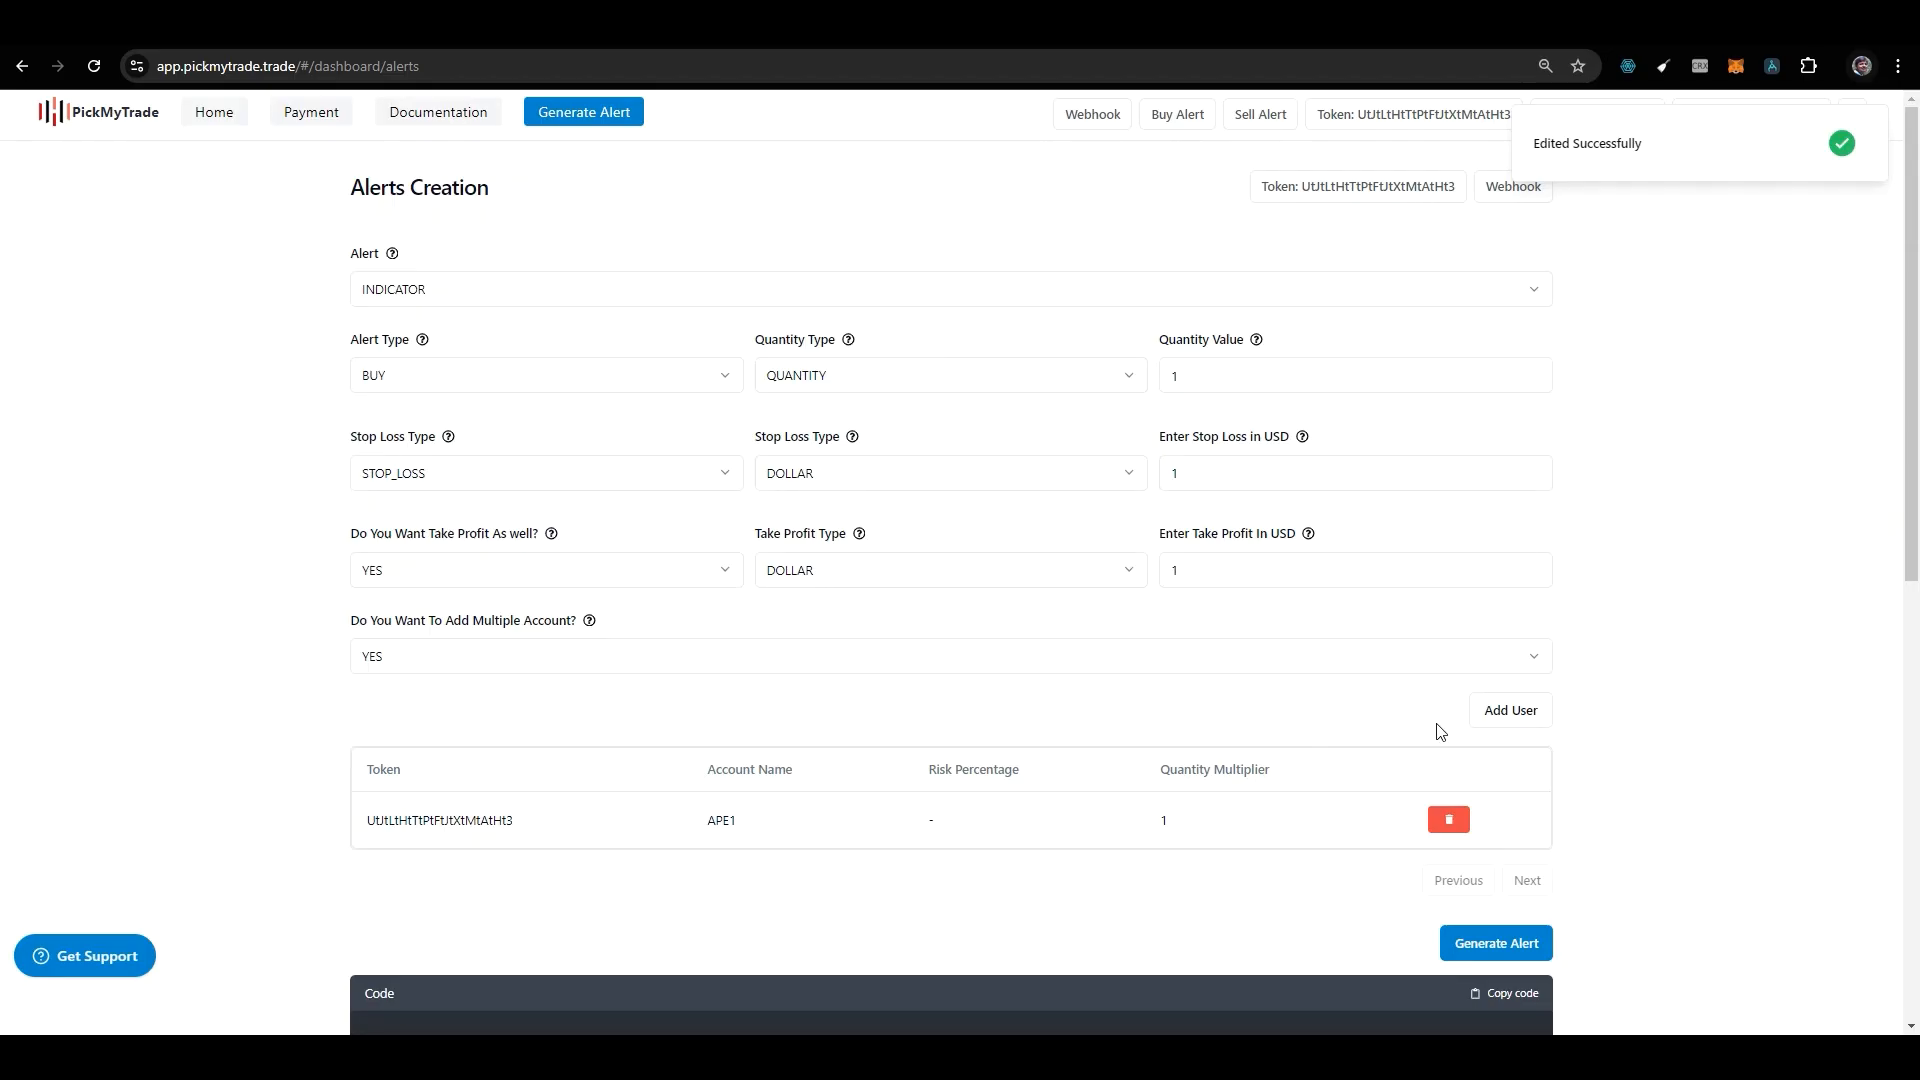
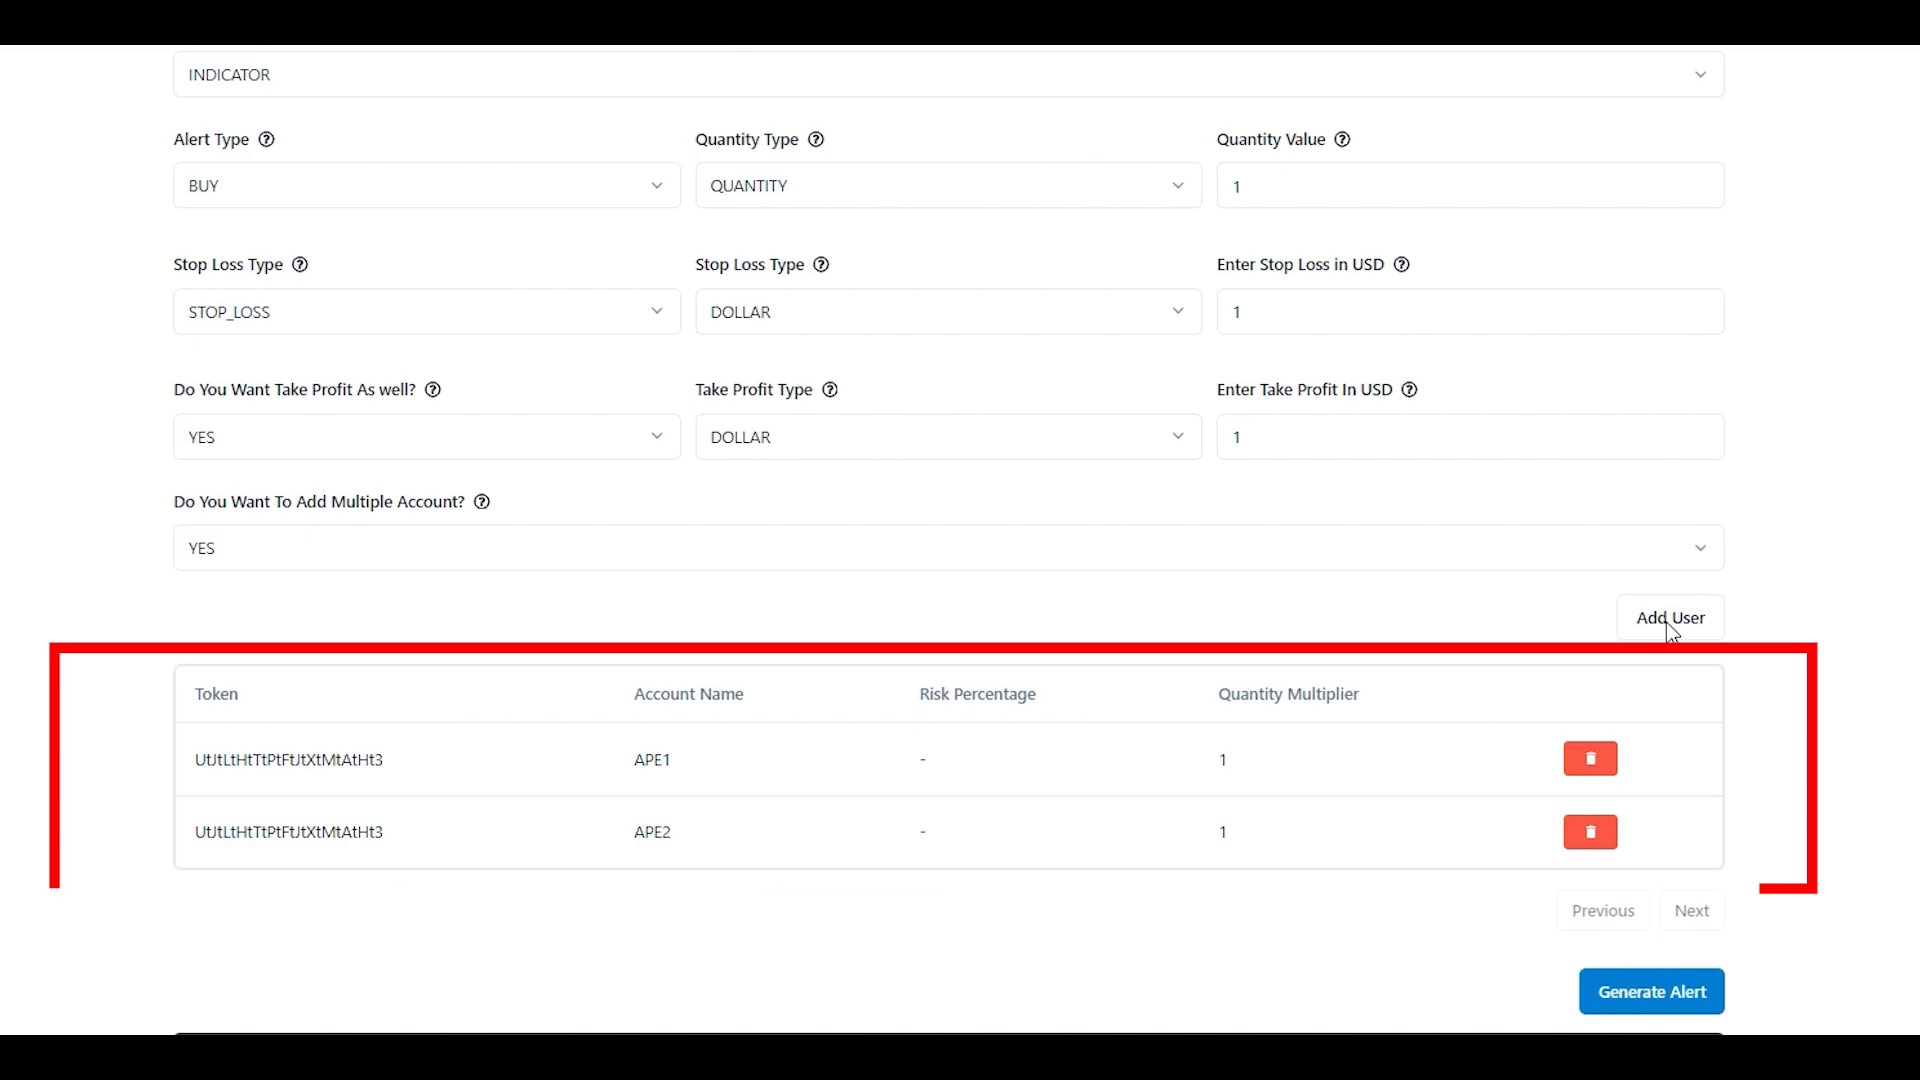
- Add your first sub-account name (AP1), set the quantity multiplier to your desired value (e.g., 1), and save the changes.
- Repeat this process for your second sub-account (AP2).
Inviting Your Friend’s Accounts
Once your accounts are set up, it’s time to add your friend Andrew’s accounts:
- Click on ‘Add User’ in your PickMyTrade interface.
- In the token section, enter Andrew’s PickMyTrade token.
- Input the first sub-account name (FT1) and set the quantity multiplier to 1, then save it.
- Click ‘Add User’ again and enter the details for his second sub-account (FT2).
Generating Alerts for Automated Trading
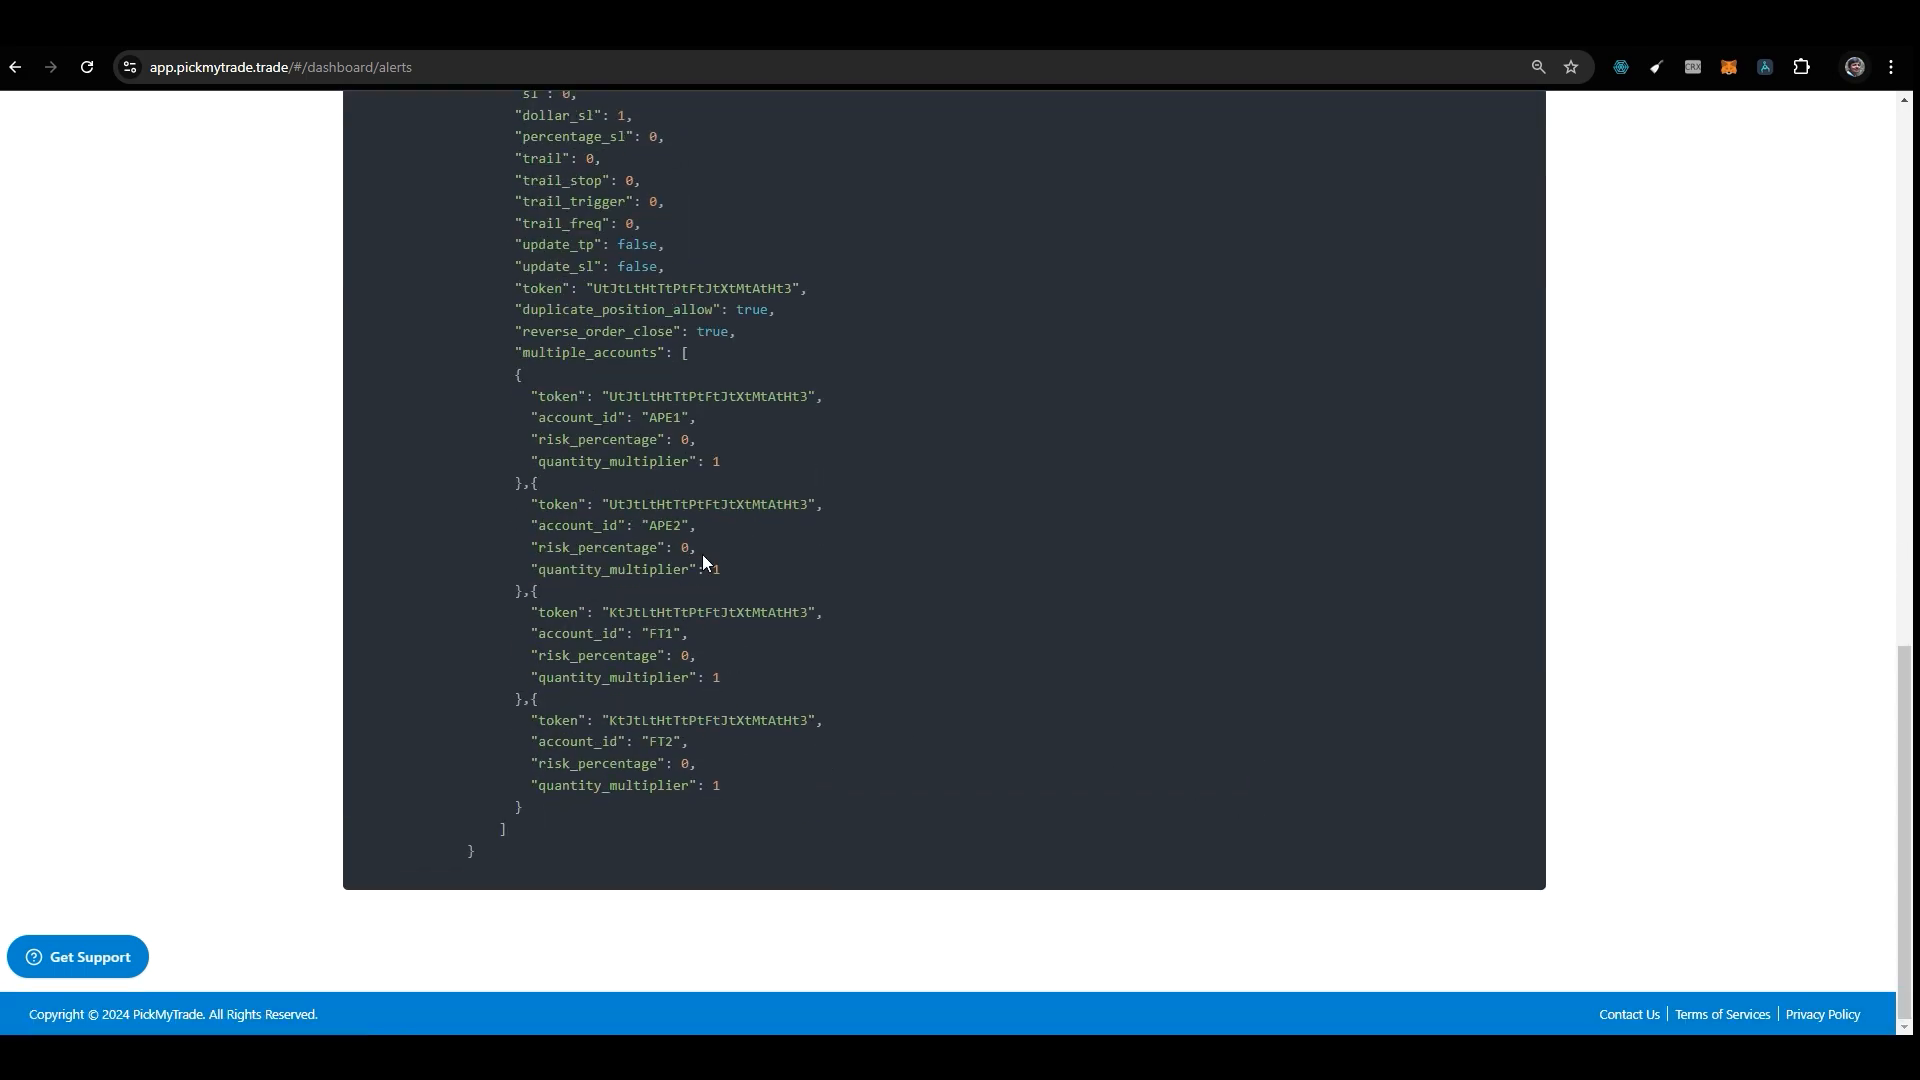
With all accounts added, the next step is to generate an alert. This alert will automate the trading process across both your and Andrew’s accounts with a single notification from TradingView.
- Click on ‘Generate Alert’ in your PickMyTrade dashboard.
- You will see an alert code generated for all four accounts. Copy this code.
- Now, head over to TradingView and create a new alert.
- In the alert settings, paste the copied code into the message box.
Setting Up Webhooks for Notifications
To ensure that your alerts are actionable, you need to set up webhooks:
- On your PickMyTrade dashboard, find the webhook section and copy the webhook URL.
- Return to your TradingView alert settings and paste the webhook URL into the notification section.
- Finally, click on ‘Create Alert’ to finalize the setup.

Benefits of Using PickMyTrade
The integration of PickMyTrade with Tradovate offers several advantages:
- Efficiency: Execute trades across multiple accounts with a single alert, saving time and reducing manual errors.
- Flexibility: Manage different trading strategies across various accounts without the need for constant monitoring.
- Automation: Set up alerts based on market conditions, allowing for immediate execution of trades when conditions are met.
Common Questions About Using PickMyTrade
As with any trading platform, users often have questions about functionality and features. Here are some frequently asked questions:
1. How do I find my PickMyTrade token?
Your PickMyTrade token can be found in your account dashboard once you have created your account.
2. Can I automate trades for multiple clients?
Yes, you can automate trades for multiple clients as long as you have their PickMyTrade tokens and sub-account names.
3. What happens if I want to change a sub-account name?
You can easily edit the sub-account name in your PickMyTrade settings and update the corresponding alerts in TradingView.
4. Is there a limit to the number of accounts I can connect?
No, there is no specific limit to the number of accounts you can connect; however, ensure you have the correct tokens and account details.
Conclusion
Automating trades across multiple Tradovate accounts using PickMyTrade is a powerful way to enhance your trading strategy. By following the steps outlined in this guide, you can streamline your trading process, allowing for efficient management of multiple accounts with ease. If you’re ready to take your trading to the next level, consider leveraging PickMyTrade for your automated trading needs.
For more information and tutorials on trading strategies, feel free to explore additional resources on platforms like YouTube or learn how to set alerts for various trading strategies through YouTube.
Join the automated trading revolution today with PickMyTrade and take control of your trading journey!